Tuesday, 25 May 2021

Anglo-Zulu War - Rorke's Drift - 28mm


The last few weeks have seen my first proper foray into making and painting buildings.  This is not something that I normally do.  I find buildings to be a complicated beast on the wargaming table unless it's a skirmish game. A real scale conundrum.  Anything approaching scale size for a figure is probably going to be the same length as a battalion, so the small barn becomes about 300 yards long on the board!


However, this is Rorke's Drift and it just has to be made to work!  I was inspired by the game scenario in the Zulu War supplement produced by Warlord Games.  To be honest I think the scenarios in this particular book are brilliant. A wide variety of methods of play and they all look great fun.


I really liked the look of the Rorke's Drift battle set that Warlord Games brought out a number of years ago.  Unfortunately I was a bit slow and by the time I decided to buy one, they had become almost unobtainable.  After an extensive search I found a set advertised by a company. After ordering it they contacted me to confess that it was an error but they had the same parts to put a near complete set together but not 'in the box'.  I took up the offer.


Most of the items are here, though I had to buy the barricades and walls from Warlord Games recently.  Of course, Warlord Games are back in full production of the battle sets again now!


I decided to use Perry's British Infantry as they are such superb figures.  I just really like their figures...a lot!


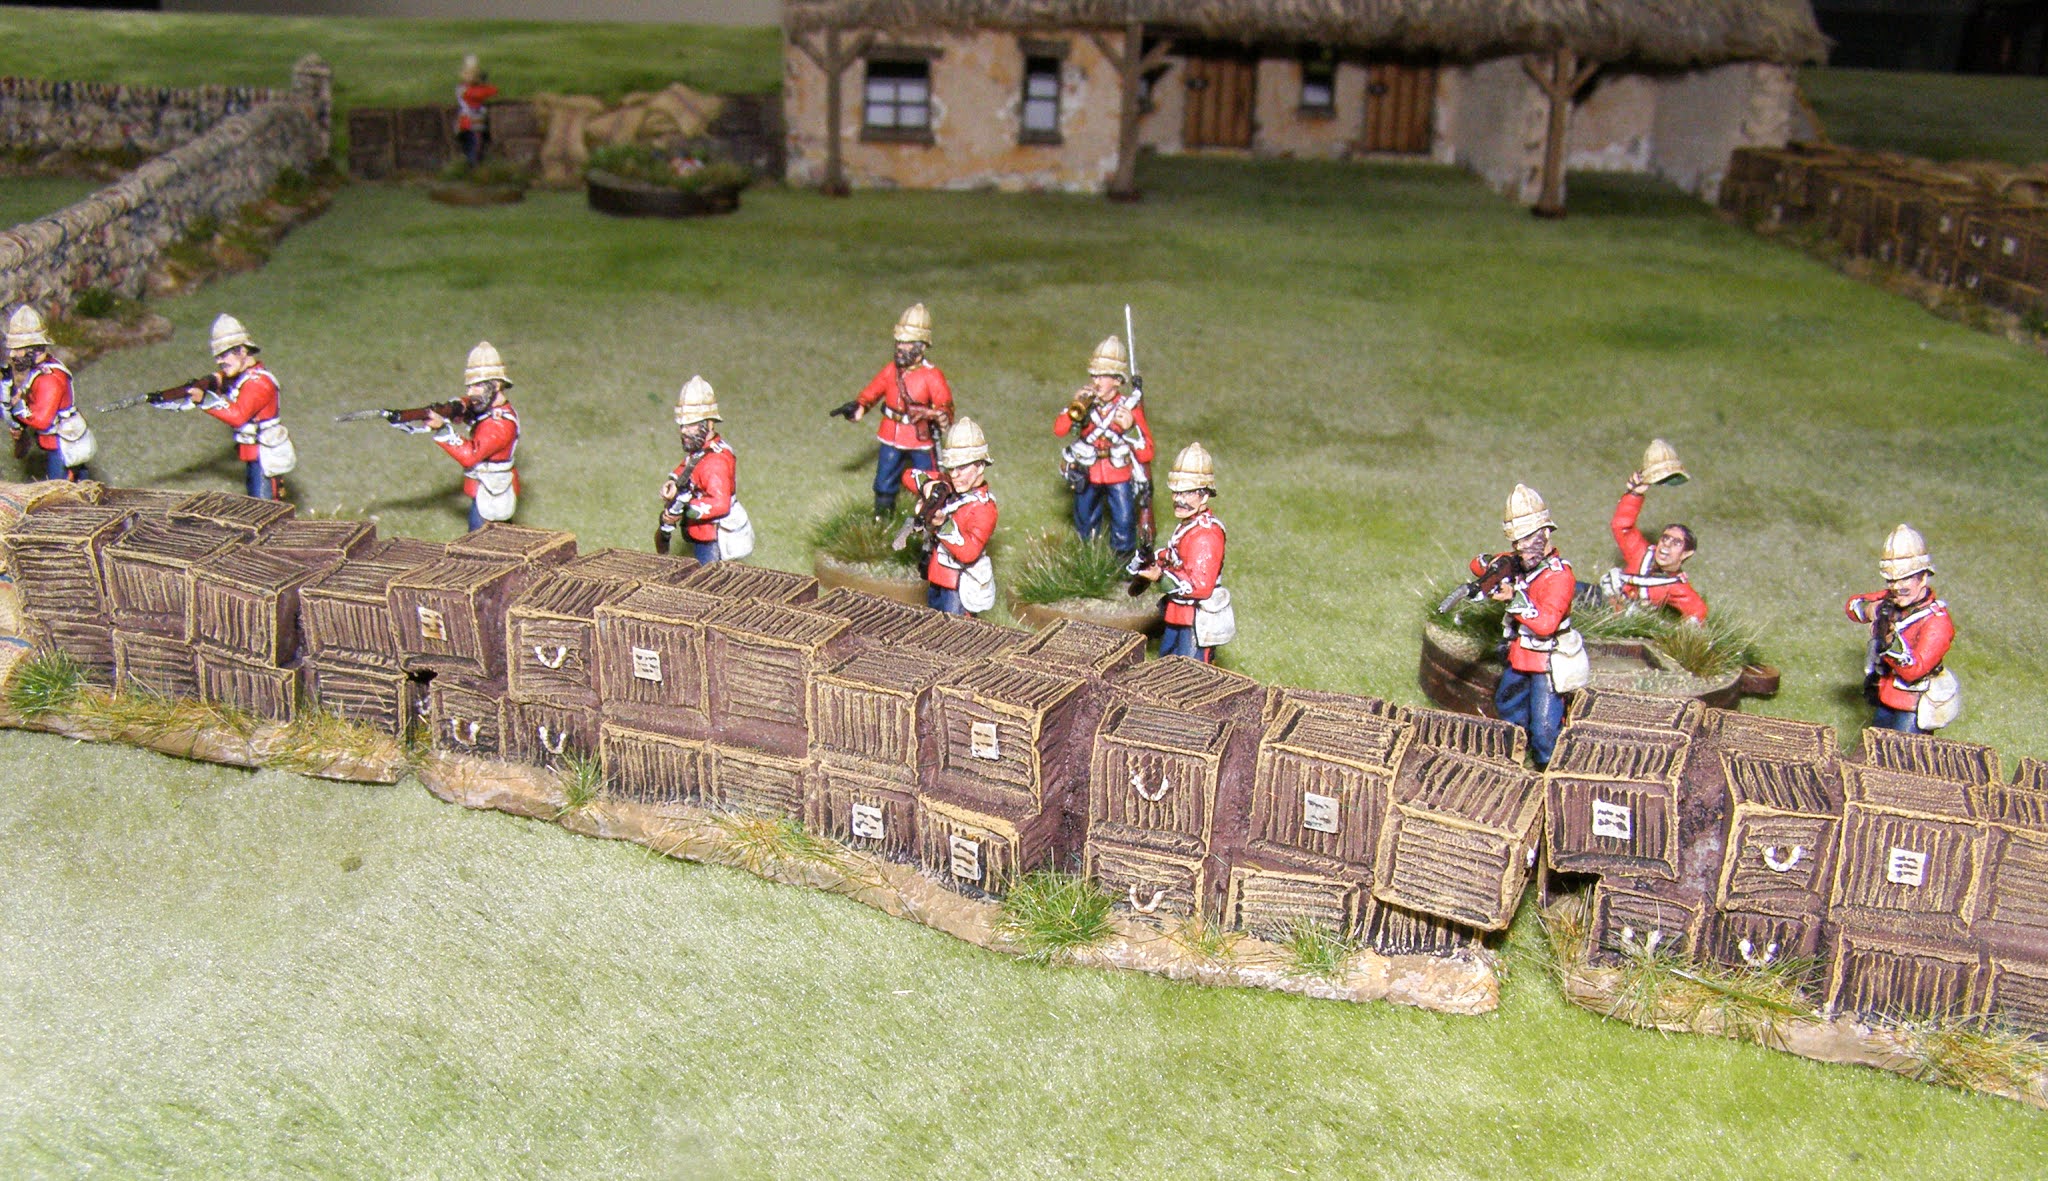
I also like all of the biscuit box barricades made by Warlord Games and they were not too hard to do once I decided on methods. I did consider whether to use washes or dry brushing and ended up doing both.


Photo above by war correspondent Norris 'Noggs' Newman (or maybe not!)


The Zulus I have so far are mix of the Warlord Games figures and Perry's. I'm a long way off from having thousands of them yet!


The dreaded mealie bags - Oh my goodness, the painting pain that these were!


Before I get onto the buildings, I should mention the Mealie bags, again made by Warlord Games.  These are really nice and look right.  I have seen some sets by another company where the bags have been stacked on top of each other in the fashion that a child might stack 4 bricks and then stack 4 next to them and so on, with no overlap.  I suspect the Zulu's would have found such a method of stacking literally child's play to knock over.  

So top marks to Warlord Games on getting a great 'hurried' but stacked 'under the eyes of a Royal Engineer Officer' look about them. The texturing is nice too. 

I was not sure whether to paint the red and blue lines on them. I did wonder if the lines were authentic and on Googling the question, I found the topic had been asked some years ago on the TMP page.  Unfortunately the poster had been utterly ridiculed (the fate of many decent sorts asking help I note, on that very odd website).

I thought his question valid, as the lines really do say 'Mealie bag' and not sandbag. It's that little attention to detail that makes a difference.  It's why we paint the right lace, collars and cuffs on our Napoleonics or Seven Years War figures. 

Anyway, a little search found this portrait of Rorke's Drift by Lady Butler and the detail is below. Perfect!


The frustrating bit...  Having decided to put the lines on, I settled on Carmine Red and a Foundry French Blue 'C'.  The lines took ages.  Ages and ages.  

When I had just two more barricade sections left, my mind wandered and I thought to myself. 'I wonder if there is a market if I designed some simple way of putting lines on models?.....and then it hit me...a pen!  A red pen and a blue pen... so simple!. Biros would be perfect!  And so they were!  A 4 hour job of one section became about 10 minutes.

 It was miraculous...at least until I put the spray varnish on. Then the colours bled into the mealie bags...and so I had to start again...with paint and thin brush again.

Ah well...It's done now!


I have only ever made one small MDF building before so this was really interesting to make.  The buildings are from '4Ground' and sold in the Warlord Games sets.  The buildings go together really well and I quite enjoyed making them.  My only issue with MDF is that they look a bit flat. I read of a technique using 'Degu Dust' from pet supplies shops to texture MDF buildings to put some life into them.  As ambitious as it was, this is what I did.

The thatching is teddy bear fur which I coated in PVA glue and water prior to painting. There were some long off-cuts which gave me immense fun pretending to female friends that I had grown a 'ginger mullet' over lockdown by sticking one end in the back of my collar....


Above is one of the nicest things that I have painted up! It is a resin model of a wagon covered in mealie bags. Ammunition boxes and biscuit boxes are on there too as part of the casting. Even one of the mealie bags has split open inside and spilt the grain. It is a wonderful model and made by Warlord Games. Again top marks to them, it really is an absolute beauty.


Some more shots of the buildings follows.  With the Degu Dust it was necessary to apply it over PVA glue and then I had to use 3 thick coats of varnish spray to help it to stick without rubbing off. I store it in it's own boxes and I won't be playing Rorke's Drift too frequently, so I hope it lasts.


One downside to these battle sets becomes apparent when finally putting it all together.  It is large.  I think I need a bigger table and this one is 8 feet by 4 feet!  I'm really not sure how I'm going to be able to play with it on the field!


There is one major absence (besides enough troops and table space!).  And that is the mealie bag redoubt.  I note that Warlord Games no longer sell it separately and only put it in their boxed battle sets.  I will write to them to ask if they can sell one separately (which would be jolly nice of them) or I shall have to keep checking Ebay or make my own.  The latter will be a joy of course...as this will mean not only having the pleasure of painting more lines on Mealie Bags but making them too!

Maybe I should have opted to create Isandlwana!


Update 26 May 21 - I emailed Warlord Games last night to ask if I could buy the Mealie Bag Redoubt set  from them even though it is a battle set only item, and they have very kindly agreed! I'm delighted - Thank you very much Warlord Games!

Thursday, 29 April 2021

Anglo-Zulu War - umCijo Regiment - 28mm Perry Miniatures


I don't know what happened. One minute I'm there happily painting Greek Hoplites and the next I find myself reaching for the boxes of Perry's plastic Zulus that I bought last year.  I must have imagined that I heard the drums of an approaching Impi, or perhaps it was taking my Martini Henry rifle to the range last week for the first time for a couple of years, but either way I was inspired and before I knew it I had finished painting the whole box!


The figures really are very well designed.  Unlike a lot of plastic sets from some other manufacturers, it is possible to be imaginative and create a lot of different positions.  The arms and heads are separate from the warrior's bodies so allow a lot of creativity.


I thought I would try to use washes extensively with these figures, using the main colour as the base coat and applying a wash and a final highlight. This worked very well and sped the process nicely.  There was no escaping the need to add some detail and carefully highlight the skin to avoid the figures looking too plain though. 


I decided to go for a regiment that was in the thick of some of the major actions of the Zulu War.  The umCijo regiment were heavily involved so I opted for these. As an unmarried regiment, the warriors do not have the head ring.  

Some manufacturers show unmarried warriors wearing a whole plethora of exotic head-dresses.  This does not appear to be borne out by historical records.  King Cetshwayo ordered his troops to muster without ceremonial accoutrements prior to the first engagements with the British.


I have chosen to have each stand of 8 figures represent an amaviyo, of company strength.  There is one leader of each amaviyo who has slightly more exotic head-dress to show his status.


I have to say that it was great fun to try to make each figure into a real character.


One time consuming part was having to paint on all of the white strapping on the shields which holds the leather hide to the central spar.  There was no getting around this. I have tried dry brushing but the raised surface texture always catches half of the paint and extensive touching up is then necessary.  It was better to pick my time, put on some good mellow music and just hand paint each line as carefully as possible.


A nice touch was the figure falling backwards from being shot. This is a great figure that the Perry's give instructions for on how to assemble.


A sepia photo below - straight from 'The Graphic' newspaper of the time (!)


The Zulu's had quite a lot of firepower and the Perry's give a good number of muskets and spare arms to make more shooting troops than I chose to do from this box.


Also really useful are the casualty figures which make superb markers.  I avoided putting blood etc on, it's clear enough what the figure represents and our imagination can fill in the rest.


I have the Rorkes Drift set currently on my table being finished off and I will hopefully do a post on this soon.  I'm hoping the enthusiasm stays with me to do a number of boxes of Zulu's as I do need rather a lot of them.  I shall take my Martini Henry out on the range this weekend and see if it helps to keep me focussed on this fascinating period of history.

Tuesday, 20 April 2021

Peloponnesian War - Spartan Command - 28mm Wargames Foundry


This was a delight to paint up. This vignette is from the Wargames Foundry Spartan Officers set, with one figure from one of their command sets.  


I have never painted up an animal sacrifice scene before so this was something new for me!   According to the Osprey books that I used as reference material, the Spartans placed great importance on the pre-battle sacrifice.  One of the Osprey books has a wonderful illustration of such a scene going on  with a  storm of arrows landing around them!  


Given the importance of the scene, I decided that this had to be Senior Command stand and they had to be fully engaged in watching the outcome - no matter what else is happening on the battlefield!


The drably dressed Helot slave boy provided a nice contrast to the powerful figures in the scene.


The  relative simplicity of the Spartan clothing and equipment meant that I could invest a little extra time in texture, highlighting and lowlighting.


The officer above is clearly a little more concerned about something and with sword drawn and shield ready, he is prepared to defend the ceremony attendees - perhaps he has seen the Athenian light troops drawing nearer and preparing their bows and slings.


I used the Victrix dory/dorata instead of the Foundry supplied wire spears.  The two were a world apart in detail and for a vignette like this I really wanted the best for the figures.


A few more photos of the whole composition are below.  I often see command stands as a necessary evil.  I always like to use commanders in games with command and communication taking central importance.  However, I'm always short of troops and I normally find that I would rather be painting lots of troops instead of a few commanders (who need extra time investment in details).  

These Spartan's were a lot of fun to paint and to experiment with the composition and I didn't regret the time spent on these one bit.


Stay tuned for the next instalment!  I'm working on several things at once and I've no idea which to post up next!