Thursday 28 January 2021

Board Game - Battle of Britain - Plastic Soldier Company


In my last post I said it would be Confederates that were on my painting table. This was true, however, a flag shortage meant that work is still ongoing as I await a delivery in the post of more flags.

However, I have been doing something completely different and playing a wargaming board game.  This is a new departure for me if I don't count X-Wing or Wings of Glory, which are somewhat different.

I have read many posts on playing board games but I never took the leap, I think, because they don't involve the traditional painted pieces.  Also the strict format seemed constraining.  I bought a hex wargame from a magazine in about 1982, but could never get my head around it and it just looked...well, a bit dull!


Battle of Britain Box Artwork - This game immediately grabs my attention!


Playing some online board games with friends during this lockdown has opened my mind to making a purchase and giving one of the newer games a try out.  The box art was the first thing that caught my eye. It is just terrific and evocative of the very best of the Airfix box artwork.  I'd happily buy a print of that, frame it and hang it on my wall.

Nice big fold out board, very clear, with all the important locations shown


I had read a lot of reviews and watched them online and they all seemed very positive indeed.  So the game became my Christmas gift to myself this year.  

Now I should say here that I don't intend to give a structured review, just my thoughts on the game and some of the mechanics.  Though I will probably go into some detail.

On opening the box I was very impressed by the quality of all of the items.  The card pieces were very nicely made and just popped out of their frames very satisfyingly with no ripping.  The plastic aircraft are very nice indeed. Barely any flash. There were just two sprue marks on each plane which a sharp scalpel made short work of.  The planes are of a nice hard plastic, and unlike the bendy winged Spitfires in 'Blood Red Skies', there is no bending at all here with these.  The only small issue was the fit of the planes into the plastic stands.  It became clear that glue was going to be the only way ahead.


Before I could glue I had to know which planes were going to be with which Squadron, and it was here that I met my first minor issues.  There were more planes than stands.  Thankfully I read the PSC errata page on their website and it clarified that there were additional planes so you could choose different types as desired, so that solved that one.

I then read up on the RAF Group organisational structure to try to make the chosen model representative of the main type in the Group, i.e mostly Spitfires or Hurricanes and then I would glue on as appropriate.   It was then that it struck me that most of the units and airfields had been left out of the game.  There is no mention of Middle Wallop, or Biggin Hill or many others.  

It became clear that the game is representational and not a true historic reproduction.  It became obvious that this was by necessity.  The playing surface would have to be at least 8 feet by 4 feet to get all of the airfields on and the game would be an unwieldy beast.  The Squadron Operational State boards would require a table all of their own and the counters would be in their thousands.

No, what we have here is a game that gives a nice slice of the history and gives a very good representation in the scale that it does.  The game is very playable in the format that it is condensed by necessity to.

The rulebook is a real strong point of the game. The rules have been written so clearly and take the player through the game-play step by step. They explain everything so well and give very good examples.  


There are 4 RAF Groups and each has an operational state board as shown above.  It is simple but works very effectively.  I did struggle with each Group being organised into 'Flights'.  This phraseology works with squadrons but it does not fit correctly in a Group.  Again, I can see why it's been done this way.  The squadrons are represented (but not named) on each of the cards that you see.  The total number of squadrons are probably historically accurate for each group, though I have not counted to check this.

Each RAF Group has either 3 or 4 Flights. There are 3 squadrons at each airfield to start with.  The Combat Ready cards are squadrons in reserve. The damaged cards on the left are squadrons lost in combat which are not operational until resources can be allocated to repair them...and that is what one of the most interesting challenges of the game is about;  trying to remain operational by allocating resources to match competing priorities.


The Luftwaffe has a similar board (above), but they have fuel indicators and missions on their boards.  The mission cards just below their operational status boards show successful missions carried out by the flights and this goes to make victory points at the end.


The production resource board (above) keeps track of damage and the availability of resources within a group to repair damage each turn.  The more points available means more dice to throw and possibly more resources resulting.  Points can be spent on repairing radar stations or airfields or making squadrons operational.


The game in full flow above.  There is a proper scrum down at the start as the Luftwaffe inevitably charge towards the coast and are intercepted by radar.  This was a bit disconcerting at the beginning but things shake down and game play spreads out over the 4 game turns. Aircraft fly inland to carry out their missions, and the RAF returns to re-arm and deploy again with reserve squadrons as necessary.


This is a fighter 'flight' at readiness on the Airfield.  The flight might consist of several squadrons of different types of fighters, including Spitfires, Hurricanes, Defiants, Gladiators and Blenheims.  The very high quality of the board and playing pieces are apparent.


Dice, a key component of the game. The method is simple and very effective. The game has clearly been play-tested a lot and the mechanics all work around each side throwing the dice. White dice for RAF and black for Luftwaffe.  The appearance of either roundels or crosses or blank, decide the outcome of all actions.  There is a lot of dice throwing.  Nice and simple and it works well!


It's important for players who are used to playing Wings of Glory or Blood Red Skies to remember that each aircraft in this game is representational of many squadrons. It is in effect a marker and will not be swirling around in a dogfight.  Aesthetically the aircraft really do look really good on the board and they do represent what is going on.


This is an example of a combat between an RAF and Luftwaffe flight. It is an intercept as opposed to a dogfight.  This seemed like an odd distinction to me initially but the designer has clearly thought it through and it seems pretty inspired.  The way to think of  the difference is that an intercept represents the RAF squadrons being guided by radar into a higher altitude position and then sweeping down and taking on the whole/or a rapid sample of planes on a diving pass, so the enemy can be a random mix of bombers and fighters.

When a dogfight occurs, it is not a radar guided intercept but both forces flying towards each other, giving time for the Luftwaffe to send their fighters to the fore, so the Luftwaffe can choose which aircraft to fight with first (including fighter aces).

This really does add another layer to the game and it was only on the second play through that this subtle difference and the different way that combat is played out became apparent to me.


Above is another view of the superb board.  Radar stations can be seen around the coast.


Above is another view of the production board.  On this picture, bombing of the radar stations is becoming an issue and gaps are appearing which the Luftwaffe are starting to use to fly through the airspace undetected.  Hopefully the Observer Corps will spot them. There is indeed, even a throw to include the Observer Corps, as well as defensive Ack-ack fire when the Luftwaffe are on bombing runs.

Above we see 10 Group under some serious pressure.  All aircraft have returned to base following combat.  There are no combat ready squadrons as reserves.  There is a large collection of damaged squadrons on the left that have insufficient resources to carry out repairs.  'A Flight' is down to 2 Squadrons, 'B Flight' is grounded with no serviceable planes and 'C Flight' has one Squadron (these are the cards beneath the planes).

So there we have it.  Much more detail written than I intended!  I hope this is of help to anyone thinking of buying the game.  I really do like it a lot.  The minor points really are very small.  Once I had curbed my unrealistic expectation of what a board game of this size could feasibly cover, I could then think about the mechanisms and this is when the designer's skill really became apparent to me.   

I have played it through twice as solo play.  The first game took me about 5 hours as I was reading the rules for the first time too.  That was a close game; 44 to 42 Victory Points with the Luftwaffe just taking the victory.  It does work as a solo play though the Luftwaffe missions would normally remain secret and unknown to the RAF player. Having said that, even having knowledge of where the Luftwaffe were heading to raid did not help me sometimes, as the RAF player, when my airfields were unserviceable and my surviving fighters in no strength to intercept!

On the second occasion, the RAF had about 50 VPs to the Lufwaffe's 41.  I think I became better at resource management on the second occasion, and I was also being a bit too daring with launching long fuel-sapping raids to achieve costly objectives for the Luftwaffe!  This second game took about 3 hours.  

I think the game was well worth the money. The components are really nice, the game play is very neat and the box art...amazing!


Thursday 21 January 2021

Great War - Whippet Tank - 28mm - 1st Corps Miniatures

This arrived in the post before the Confederate command figures that I had been expecting.  I hadn't planned to start painting the tank yet but once I opened the parcel, I couldn't wait to commence!


The model is a Whippet tank in 28mm from 1st Corps Miniatures.  It is in resin with metal Hotchkiss machine guns and a metal commanders hatch (with optional metal commander).  As commanding with the hatch open wasn't really a thing in combat then, I decided to leave the commander out from the model.


I was pleased to see that the model came as one piece with tracks already fitted. It was very cleanly moulded with only a small amount of trimming, mostly on the base which models the proper effect of weight and balance of the tank.  Only the few metal parts were separate.  I was so impressed with the appearance of this early tank that I finished it in two days of receiving it...if only the rest of my lead/plastic mountain could be painted so quickly!


I wanted to weather the tank without going over the top, so I used a series of washes and dry brushing to get the effect I wanted.  I was keen not to plaster it in mud as the vehicle was used largely in the breakout rather than crossing no-mans land, but normal country roads and fields are going to muddy the vehicle somewhat.  I found some photos online where canvas mudguards had been fitted, so clearly mud was an issue for the crews.  I imagine that pushing the rear door open must have been difficult, when the bottom of it was solid with mud flung up from the tracks.


All it all it was a lovely model to paint and I note that the armoured cars in the same range look amazing too.  I shall stick to Great War Miniatures for the figures though I did buy a couple of British snipers from 1st Corps as GWM don't produce snipers for the British.

The tank looks equally awesome from the rear - if anything it looks more likely that it should be going in this direction, as we are more used to seeing the engine being in the rear of  tanks. I note that the fuel tank is in the front angled box which struck me as an odd position first of all, but then it does make sense keeping fuel away from the crew.  Spare fuel was often kept stored above the crew compartment, however, which proved to be a dreadful location according to the original accounts. 

Confederates next...unless something else distracts me!

Wednesday 13 January 2021

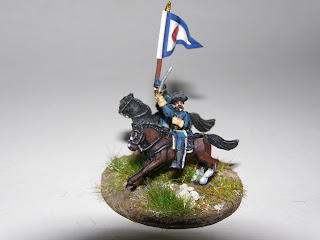
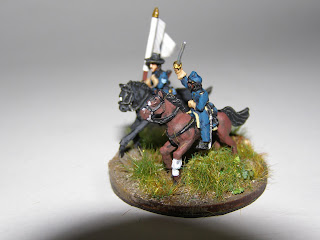
American Civil War - Union Commanders - 15mm

It's been a couple of years since I posted any new additions to my American Civil War collection.  As part of my grand re-organisation, I have now added quite a number of new additions to my Union Army command structure.

Army Commander:  Major General Meade and staff

I really do want Command and Control to feature highly in my games and so I decided that the command elements really needed to stand out and be rapidly identifiable.  To that end, for Army commanders there are 5 figures on the stand, for Corps commanders there are 4 figures, for Divisional commanders there are 3 figures and for Brigade commanders there will be 2.  Battalion commanders will be with their units.


 I Corps Commander: Major General Reynolds

The figures are mostly 15mm Blue Moon, especially the staff. The Blue Moon figures are very crisp and are very nice indeed. They are a touch larger than the Old Glory figures who form some of the personalities shown here.  There is even the occasional veteran Minifig painted to the same standard and mingling in surprisingly well.


Divisional Commander, 1 Div, I Corps

The flags in all cases shown are from the 15mm range by GMB.  These really are magnificent flags.  I completed nine Brigade command stands today, so I hope the following photos are not too repetitive.  I did shake and blow off the static grass but its only when the photos are enlarged that there is grass clearly visible in some cases, looking quite unsightly too!  I can only assume that the horses must have had a good roll in some grass fodder!


                                                    Divisional Commander, 3 Div, I Corps


                                                    Divisional Commander, 2 Div, I Corps

Out of sequence! I should have posted 2 Div Commander before 3 Div but there we go.  I was just pleased to find a way to get Blogger to post in the correct order and then I messed up these two!


1 Brigade Commander, 1 Div

Flags have been coated with PVA glue. The reason for this was to protect the flag without any of the issues that varnish can cause, such as damaging the ink of the print, or turning the flag glossy.  It also gives strength to the flag, allowing bending without the flag designs cracking.


2 Brigade Commander, I Div

I aim to do a photography course this year when the lockdown situation permits.  This will hopefully improve my photographs. I have played with the settings somewhat and this has improved the brightness and removed some of the blur which I normally get.   I tend to balance a day light bulb with one hand whilst trying to take the snap with the other.  

If I am too close to the figure then the flash picks up the shape of the lens as shadow (as can be seen above).  I do use flash now and use the 'M' setting instead of the 'Auto' setting. I have no idea what the 'M' stands for, but I think the shutter time is faster now and cuts out my wobble!  I try to keep at least 6" back from the figure and use the zoom on the lens as necessary.


3 Brigade Commander, 1 Div

I plan to use these figures for both Fire and Fury, THE ruleset that made wargaming fun for me all those years ago, and also my much modified Black Powder rules.  It will be Regimental Fire and Fury that I think will be played and maybe some modified command rules as necessary.

I do have the Black Powder ACW supplement, which is a lovely thick book with great information, though I do take issue on some trivial points in it. I also think that by not naming regiments in the scenario unit lists it devalued itself a little. Ah well, I guess it means I'll just have to do more research.  

I will not be using their 'smoothbore shoots faster than rifle' rules though, as I have fired thousands of Minies through my Enfields and know just how quick and easy they are to load.


1 Brigade Commander, 2 Div


2 Brigade Commander, 2 Div


3 Brigade Commander, 2 Div


1 Brigade Commander, 3 Div


2 Brigade Commander, 3 Div


3 Brigade Commander, 3 Div


I think that will do for now.  I have Confederate commanders on order, and a Whippet tank for my WW1 British in 28mm.  However the post system is currently badly delayed so I might have to start another unit of something rather than hang on for those to arrive.  I'll decide tomorrow!

Sunday 3 January 2021

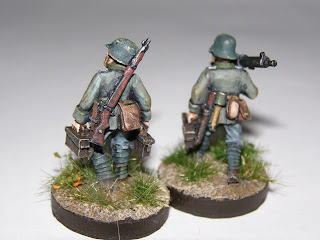
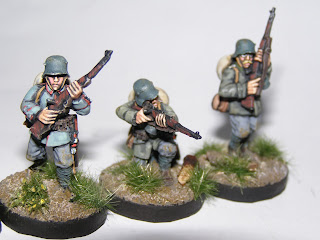
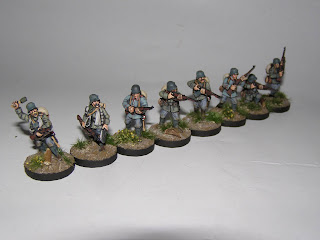
Great War - 1918 German Infantry Platoon - 28mm


Happy New Year everyone!  This was one of those units that was supposed to have been finished before Christmas, but crazy days, how does it all get so busy?  I don't think I picked up a paintbrush for a week!

This German Platoon is now nearly complete other than 2 x JNCO's/senior Privates to run two of the sections.  I also have some figures to paint to complete some support sections, such as the Granatenwerfer and an assault bombing section.


I  was greatly assisted by this idea which I saw on one of the blogs, but I cannot recall who it was (sorry!).  I have magnetic sheet on the floor of the box and also on the bases of the figures.  By printing an organisation sheet with relevant gaps in the Sections, I was able to focus much more clearly on what I was trying to achieve (and see which figures I had done).

The above picture focuses mostly on the supports and the picture below on the platoon of the 246th Reserve Regiment that I was re-creating.  (Blogger seems to post everything in reverse order now - took 3 attempts and still it was backwards!)


These machine gunners are left over but are bound to find a home in another Platoon.


I have used a colour coding method to match the coloured marks on the organisation sheet in the storage box, the two lines signifying 2nd Platoon.


Above and below is the LMG section comprising riflemen and an LMG team.


Rifle Sections above and below.


I have painted up 2 bombers for each Section.  Finding accurate information of how the 1918 German Platoons was formed appears hard to find. The Too Fat Lardies have produced supplements with some good information and this does seem to emphasise that by mid- 1918 there were no hard and fast rules anymore.  

Manpower shortages would no doubt have caused constant change.  It appears that were generally 4 sections in a Platoon but an extra bombing section and a Granatenwerfer section could also be added in some regiments and in other regiments the organisation might have been different again.  A complex topic which I won't go into too much detail with here.


The figures are again by Great War Miniatures and contain the earlier tunic as well as the later Bluse with hidden buttons under the front flap.  This allowed some playing with shades again, which adds interest and reflects the fabric supply shortages by late war.


I intend using the Chain of Command rules as re-written for WW1  in one of the Too Fat Lardies supplements.  The leaders take on a major importance so need to be visible when playing as their location on the battlefield is important.  I used a simple method of using a red brown for the bases of officers, a dark buff for SNCO's and a dragoon green for JNCO's. This was a lesson learned from playtests when I found that I was playing hunt the leader and spot the rank badges every turn.


The Great War Miniatures bombers just really look the part (above and below), I wasn't going to but I might paint up a Stossstrupp Assault Section at some point.


I felt slightly sorry for the figure below.  I was short of an SNCO so had to demote an officer.  As an officer he was slightly redundant and left over, but as a Vize-Feldwebel he will now be playing an important role in getting his men motivated and moving.  From my research it appears that the Vize-Feldwebel was one of those ranks which was senior enough to have officer accoutrements (such as belt, sword-knot etc) issued (rather like modern British Army Warrant Officers who often find themselves saluted due to wearing so many officer uniform distinctions).  It seems the Germans did similar.

Anyway, my new Vize-Feldwebel appears to be a man of action so will hopefully be pleased with his new role.


More officers above and below.


That might be all of my WW1 painting for the time being.  I have ordered a Whippet tank from 1st Corps, but I will probably paint something completely different in the meantime.  I have no idea what yet...and that's part of the fun of it all.