Showing posts with label Pike and Shotte. Show all posts

Tuesday, 28 July 2015

Sir Marmaduke Langdale


Well, it's nice to do another blog post! Much has been going on since the last post but I have managed to get quite a bit of painting done of late too.   My games of Pike and Shotte have shown me how desperately short of command stands both my Royalist and Parliamentarian armies are.  

As much as I prefer to spend time painting infantry and cavalry instead of commanders (because of some sort of feeling of obligation to doing my very best efforts to the great and bold), I felt I could put this off no longer.

Inevitably,once started, I really got into it and enjoyed putting the colours and detail on.


This is Sir Marmaduke Langdale along with one of his senior cavalry officers.  He was an important Royalist commander during the Civil Wars, and he famously led the particularly rough and mutinous 'Northern Horse'.  More information is available at this particularly good resource:


http://bcw-project.org/biography/sir-marmaduke-langdale

Interestingly Sir Marmaduke appeared to suffer an awful lot of defeats and one can only admire his doggedness and spirited refusal to give in.


The portrait appears to show him wearing some kind of cap which seems to sit too far to the back of the head to be an armoured skull-cap, so I have made the assumption that it some sort of velvet cap, perhaps to add extra padding beneath his helmet, so have painted it as such.


The figures are all produced by Bicorne Miniatures and have been painted with a mix of Vallejo's, Citadel and mostly Foundry colours.

Monday, 11 August 2014

Pike and Shotte - ECW Battle Report


In July the 'Pike and Shotte' rules received another airing.  This time for a hypothetical game, a simple straight-forward 3 x brigade a side game with no trickery (hidden ambushes) etc but a conventional stand-up battle.


Both sides deployed a brigade in the centre with cavalry wings flanking.  This photo shows the full Royalist deployment, and will have to suffice instead of a map.  With a bit of time I will find some map-drawing software as some blogs have some outstanding maps and I feel that an illustration will just leave you feeling short-changed, if you have seen those maps.  I should also give names to my hypothetical battles, no doubt involving some use of double-entendres -alas this battle is un-named, known only to those as 'Ye 4 x 8 Field' to those who were there....

The view facing my Infantry

I took command of the Royalists and Ian commanded the Parliamentarian forces.  We threw for commanders ratings.  Waller received a good solid 8 and Hopton a 7 so I was going to be struggling a bit more with getting my orders carried out.

The first game turn commenced with a general advance of the Royalists. Orders were surprisingly obeyed and one turn of movement taken.  Parliament held their ground and put some ineffective fire down.

My brigade of Cornish Infantry at the commencement of the battle

Game turn two was similar to that of the first move.  Ineffective fire barely bothering my advance.  Could I reach the Roundheads without taking significant loss?

My Royalist Cavalry on my right wing

Game Turn 3 saw the Royalists advance again. My infantry closed further.  My cavalry advanced close to face the Roundheads but took fire from commanded shotte musketeers placed with the Parliamentarian Cavalry. These volleys caused my cavalry disorder and gave me two shaken units of the three.


More shots of the Royalist Infantry Advance

Game Turn 4 - now unfortunately here, my handwriting just went to pieces, and three weeks later I can't remember exactly what happened.  I just remember it not being pretty!  I tried to support my infantry by surprising the Roundhead Infantry.  This was from my left hand cavalry brigade as can be seen in the picture above, I have moved them in line with my infantry.  My infantry started getting really shot up in the centre and it became difficult to co-ordinate attacks as units fell into disorder.  


The battle in the centre - a hard fought action

On my right I made a do or die charge with my cavalry which was being depleted by the fire of the commanded musketeers.  This charge went in uphill against Haselrigge's cuirassiers.  I was surprised not to find any advantage in my melee to any units uphill of an opponent.  Being uphill did seem to be a desirable position (Waller at Lansdown etc), so we introduced another rule amendment here:

To Hit Modifiers: +1 for being uphill of an opponent in melee

The tweaks to the rules are getting less and less.  I think the rules are pretty well as we want them now (and we didn't ever make that many changes).

This amendment, however, did work against me as my desperate cavalry attack came tumbling back!


 Running up that hill - into a caracole of pistol fire

The Royalist Horse - beaten back and reforming

Game Turn 5. My note-taking stopped altogether - I'll blame the late hour and the complexity of the action which had by now engulfed the table. My cavalry attack on the right had failed and was beaten back where I rallied them. The infantry fight in the centre was brutal.


Although my notes became thin/non-existent, I can tell from the pics that some units routed, others recoiled back to reform while others battled on.

The only real positive for the Royalists was the left flank.  I occupied a stonewall enclosure with dragoons to secure the flank whilst I shifted my cavalry from the left to support the attack on the infantry in the centre (if I hadn't then my infantry would have broken).

The fire of my dragoons were ineffective and very disappointing however, even when firing at cavalry in column passing by them. It was bad dice throwing through and through rather than any failing in the rules, I hasten to add.

The dragoons should have emptied saddles - but alas more time on the ranges required! 


A lucky escape! One of my left flanking cavalry regiments intercepted the attackers still in column of march and chases them off!

The above pictures show the scary moment when my army was nearly outflanked by a daring route march by Ian's cavalry behind my left wing, risking fire from my dragoons.  Taking the road and defended bridge, the Roundheads nearly appeared in the rear of my army.  Thankfully I had an uncommitted regiment of horse in reserve which chased off the attackers.

The result and conclusion

Time ran out in the end.  In Pike and Shotte it must be remembered that there are a lot more units to move as each regiment of pike and musket is broken down to it's individual musket wings and pike block.  So each regiment has 3 parts to look after and throw for.  A brigade will therefore take a lot longer to play with (generally) in P&S than a brigade of the same number of regiments in Black Powder.

We declared it a draw, as my cavalry had been beaten on my right but won on the left and the centre was still heavily contested.  Both sides would probably have withdrawn come nightfall.

It was another excellent game and inspired me to do some painting of ECW figures.  I will post the pics sometime of these though currently real life has slowed my posts and painting right down.

I think the next game in a couple of weeks time will be Star Wars X-Wing, which might or might not result in pictures - depending on whether the laser fire gets too hot!


Sunday, 15 June 2014

Pike and Shotte - Battle of Whalley - April 1643


The Pike and Shotte rules received a very welcome airing this evening.  It's  been about 15 months since last playing a game with them.  Hail Caesar and Black Powder, the other rule-sets in the trilogy, both having been used since.

This evening Ian took on the role of the Royalists against my Parliamentarians to re-fight the Battle of Whalley.  The scenario was lifted straight from one of the Caliver Books produced English Civil War Gaming Scenarios books.  I have four of these and for many years have wished to have enough troops to be able to play a scenario from this excellent series of books.  With Ian's troops added too we fielded both sides very satisfactorily.

The Scenario
The battle is one of the northern battles and features a Royalist armed reconnaissance towards a mutinous and seemingly broken Roundhead force.  What should have been an overwhelming push on beaten troops turned into a rout for the Royalists as the Parliamentarians had got their act together and laid an ambush.

 The battle was fought down the length of the table.  Most of the table is occupied by the Royalists.  In the uppermost corner of the photo above is the only visible Roundhead units (2 units of cavalry) on table at the start of the turn.  It became clear to me on reading the scenario that only half of the scenario should be read out to the Royalist player.  It was better he didn't know of the ambush and was only told that as well as the two regiments of cavalry (which his attention would be on), there might be other units hidden on the board or kept off as reinforcements.  As per the scenario, I had two regiments of musket hidden ready to pop up and give fire in the stone enclosures.  Another special scenario rule was that if any casualties were inflicted in this first volley, then the receivers must take immediate break tests.

It's the Clubmen - just a pity they decided not to move far from the Alehouse in Whalley in this game!

The Forces:

Royalist: An divisional sized army of three brigades.  This consisted of:

  • 1 x Bde of 2 Regiments of Horse
  • 1 x Bde of  1 Regt of Foote (Musket wings and Pike) and 1 Regt of Dragoons
  • 1 x Bde of 2 musket blocks and 1 warband of Clubmen
Parliament:
  • 1 x Bde of 2 musket armed regiments
  • 1 x Bde of 2 Regts of Horse and 1 Regt of Dragoons
Veteran units were given 'Reliable' special rules.
Clubmen were both 'Militia' and 'Rabble'
Dragoons were 'Marauders' and could use the 'Fire and Evade' special rule

Rather than give a game turn by game turn account I will instead summarise.  I will also avoid using too many pictures as my camera phone had too little battery to use flash and as a result my photos are well below standard.

Ian's finely painted Cornish standing in for Northern Foote.  

A Brief Game Summary
The ambush worked an absolute treat. The Royalist advanced very keenly straight from the start and received a volley at point blank.  Two units of Ian's finely painted troops (Cornishmen in this case, standing in for the Earl of Derby's infantry), broke immediately.

The ambush is sprung and the scouting Royalist dragoons take a full volley at point blank in their faces, breaking them!

The Royalist cavalry moved forward and engaged the Parliamentarian  dragoons.  The dragoons somehow stood the initial charge and a desperate struggle went into the next game turn, when the dragoons broke.

A tough battle broke out amongst the stone enclosures in the centre of the Parliament position.  A unit of Royalist Pike took volley after volley and refused to break despite four break tests.  In the end a charge with musket butt and sword finally broke them!

The desperate battle.  Those pikemen just would not break!

Poor order communication slowed down any prospect of support for the Royalists.  The clubmen refused to move all game.  The Royalist cavalry were happy not to charge against my cavalry.  For my part I was to hold my cavalry back and await developments.  They could either countercharge or rescue my infantry if needed.

With the breaking of the Royalist pike, the whole Royalist brigade broke.  A Parliament victory was awarded.

Conclusion
A superb game which was great fun and allowed the Royalist commander to make exactly the same mistake that happened in the actual battle, by advancing straight into an ambush.  It was great to see the really nice Bicorne produced figures on the board again.  Pike and Shotte gave yet another excellent game.  Though my painting time has taken an enormous hit of late, it was superb to get a game in tonight. I'm very keen to play another scenario again soon.


Saturday, 30 March 2013

Battle of Hopton Heath 1643 - Scenario

A couple of weeks ago myself and Ian played another game of Pike and Shotte, but this time re-fighting an actual civil war battle.  To use a 'proper' scenario is something I have wanted to do for a very long time, and having so many historical interests it has been very difficult for me to stay with one period long enough to get a pair of historically scaled forces together.  'Fire and Fury' was the only area of real success for me with playing scenarios - the Battle of Bull Run being memorable and epic in particular.  The 15mm armies of blue and grey allowing me to paint and complete as fast as my enthusiasm could carry me.

Hopton Heath ready for the March 2013 refight with 'Pike and Shotte'


I bought the scenario book for Hopton Heath about 22 years ago or so and played it once with the ruleset it was intended for: 'Forlorn Hope'.  I had quite a large collection of poorly painted Minifigs then (since retired) and the smaller figure scale of 1:33 meant that I could play it, which I did so on my barrack room floor.  That play-test so many years ago was slow and indecisive. The tiny forces made casualties very hard to inflict and the difficult terrain meant it took ages to move anything.  All in all disappointing (as was all but one game using Forlorn Hope, and that one was was only because I won a resounding victory though it took two whole days to play!).

This time I used the same scenario book but scaled at 1:20 which gives really nice sized units for Pike and Shotte in my opinion.  Some preparation was necessary, the most obvious being re-scaling the units then making cards for each unit to show which unit they were representing and the brigade to whom they belonged.  Special unit features such as morale was also shown on the card for ease of reference.

Nothing to see here: Mostly woodland in the 'Old Deer Park'

The History Bit
The actual battle was fought in Staffordshire 370 years ago to the week of the game 19th March 1643.  ( I have just noticed the anniversary but didn't realise at the time of playing!).  In the actual battle the Parliamentarians intended to rendevous to combine forces to attack the Royalists holding Stafford.  The Royalists were forewarned of this and diverted a force to attack the Roundheads before they could strike.  The Parliamentarian Commander Sir John Gell successfully met up with Colonel William Brereton's advance party and took up a position at Hopton Heath on the hill overlooking the road from Lichfield to Stafford.  The Parliamentarians were a mix of Infantry, Cavalry, lots of artillery, dragoons and Clubmen(!).  The Royalists were mostly cavalry, with dragoons and one small unit of infantry...and one large cannon called 'Roaring Meg' (not to be confused with the mortar at Goodrich Castle).

Deployment
The Parliamentarians formed their infantry on the hill with their guns supporting.  The clubmen are also deployed on the hill. The cavalry are off on the left flank to the side of the hill giving protection to the infantry's left. Enclosures protect the infantry on their right flank.  The hill is protected by rabbit warrens. The rabbits are clearly anti-Royalist as the whole front of the hill to the road facing the Royalists is covered by the horsey-leg breakers that are the rabbits holes.  Gell's deployment was superb.  To further protect his force dragoons were placed far forward in the farm enclosures on the Royalist side.

The Royalists under the Earl of Northampton had little choice but to face the Parliamentarians with their cavalry.

View from behind the Royalists lines at the excellent Parliament position

The Actual Historical Battle
The Royalist Earl of Northampton sent his dragoons to clear the Parliament dragoons to secure his flanks (but didn't succeed on the right).  The Earl of Northampton then cleared his right with cavalry.  An artillery bombardment then followed in which the many Roundhead guns were notably unsuccessful in their shooting.  The Royalist 'Roaring Meg' having much more impact; 'the first round killed six of the men and hurt four and the next made such a lane through them that they had little mind to close again'.

Northampton then charged with his cavalry which routed all of Brereton's Roundhead cavalry.  The clubmen fled at the sight of this.  Northampton then wheeled up into the flank of Gell's by now worried infantry, who managed drive off the cavalry nonetheless with musket fire.  The cavalry turned on the exposed guns and captured some after a see-saw fight.

Gell took command of his greatly disorded force and by force of command managed to adopt his infantry into a defensive posture. The Royalist cavalry attacked the guns again and another brutal see-saw fight developed, though the Parliamentarians succeeded in dragging their guns to safety.  Northampton then went for Gell's infantry but the Roundheads stood firm and apparantly unhorsed Northampton who then refused quarter and was killed.  Sir Thomas Byron took over command and charged Gell's infantry again and he too was seriously wounded along with several other senior officers.

At this point Brereton's infantry was spotted making their way to the battlefield from their long march.  The Royalists failed to rally and withdrew off the battlefield as night fell taking the guns they captured with them.  The Parliamentarians decided to withdraw away from Stafford during the night, giving the strategic victory to the Royalists despite having won the battle (depending on which history books you read...a much debated point!).

Notoriously Gell refused to hand Northampton's body over to his son for burial unless his captured guns wagons powder and prisoners were returned.  The Royalists refused these demands so Gell had Northampton buried at a church in Derby.

Behind Gell's infantry - A strong hilltop position

The Wargame
I opted to go Parliament, mainly because they were going to be more static and I thought it would give Ian a more interesting game.  Ian's objective was to break the Parliamentarian position to leave remove the threat to Stafford.  This did mean that Ian would have very difficult task and a hard choice to make right from the outset.  My dragoons being postioned so close to his troops forced combat immediately. No flank marches or sneaky manouvres in this battle - it was going to be sabres drawn from the first throw!

Ian sent his infantry to attack the dragoons in the farm enclosures in his position right at the beginning.  This was a good move and was successful.  Ian then marshalled his first brigade of Horse to attack at an oblique at Brereton's horse facing him.  This would mean he avoided the rabbit warrens that would disorder his horse, and possibly leave Gell's infantry open to attack as per history.

My cavalry met his attack at the halt and with pistols drawn in the 'caracole' style of the early war Roundhead cavalry.  This was quite successful and emptied Royalist saddles.  The first round of combat was inconclusive but bloody.

Each new turn I had to dice for reinforcements. This was Brereton's infantry which arrived in small numbers in before darkness in the real battle.  The chances of them arriving increased per dot on a D6 each game turn.

Raw units ('Freshly Raised' in Pike and Shotte') also had to dice when attacked to see how they would react.  My dice were truly puritan as my raw units threw 'Sterling Job' The troops do their duty -no effect' and survived being overcome by terror or panic.  This was good news for me as it meant I wouldn't have units running off all over the place.

The second game turn saw the cavalry battle continue with the Royalists getting the worst of it.  Ian's second cavalry brigade refused orders to advance so his troops in combat were unsupported

Clubmen - nice and safe the way we like it thank you very much!

The view from my extreme right.  Not much happening here. The cavalry action is on my far left (in the distance)

I maintained my position with Gell's infantry and guns on the hill and let my cavalry push their advantage and continue the cavalry combat with all of their modifiers for winning and supported.  Ian's cavalry broke and tried to flee but were slowed by the terrain around the farmhouse and enclosures.  As they broke I followed up with a sweeping advance upon the same enemy. Trapped they were cut down to a man or fled.  At this point victory was conceded by the Royalists.

Brereton's well-supported cavalry counter-attack Northampton's Brigade trapping them and cutting them down
The Royalist Second Cavalry Brigade - refusing its orders to advance seals the fate of the Royalist Army

Conclusion
A fascinating scenario which played really well with Pike and Shotte as the rules.  What a contrast to the game I played with Forlorn Hope all those years ago.  Pike and Shotte gave a game that played in 3 game turns and lasted probably less time than the real battle!  I really enjoy the challenge presented by playing a historical scenario and its great to see the real problems facing the commanders replicated on the table.  In terms of wargaming, the Royalist player really is up against it as he has a large cavalry force with which to evict a strong Roundhead force in a superb position.  Ian probably did exactly the right thing by going for the Roundhead cavalry and avoiding the uphill slog over the rabbit warrens and being destroyed by musket fire and grapeshot!  If his second cavalry brigade obeyed orders he could have turned the Parliament flank and hit the Roundheads hard. Once his first brigade was gone there was no way his army was going to force that position.

I have four of the books produced by Caliver Books for ECW scenarios and I'm still building up towards decent sized forces for these.  Really looking forward to when I can though. Nothing beats trying to replicate history and facing the same challenges commanders faced in 1643, albeit with dice, lead figures and good set of rules! :-)

Saturday, 16 March 2013

Sir Ralph Hopton

or Baron Hopton of Stratton as he became known following his success in the hard fought battle in 1643.  Baron Hopton was one of the most faithful of King Charles I's commanders, and he achieved several great victories in his battles against his old friend, Sir William Waller.


Hopton was famously blown up by one of his own gunpowder wagons, by the apparent careless smoking habits of prisoners being transported.  The Clay Pipe seemed to be a great cause of spectacular demise in the gunpowder age!  Hopton survived this incident and went on to command the Royalist Western Army again.
For anyone wishing to read more about this great commander, then the link here:
http://www.british-civil-wars.co.uk/biog/hopton.htm
will provide plenty of information.


The figures are a good mixture of the finest of manufacturers of ECW figures.  Sir Ralph Hopton is one of the  excellent personality figures by Bicorne Miniatures.  The figure appears to be cast without moustache or beard, but the only portraits I have seen of him show Sir Ralph with a moustache and beard of the mid-17th Century style.  So I added these with some brushwork.


The staff officer is one from the set recently brought out by Renegade.  These are such useful figures and could be used as commanders in their own right.


The other senior officer is also from Bicorne Miniatures and is one from their King's Lifeguard of Horse set.


I have to say how much I enjoyed painting the command stands.  I find them very labour intensive as they are the figures who will always get the most scrutiny, but the result is always very satisfying.  Thankfully an army only needs a few senior commanders painted up!

Saturday, 2 March 2013

ECW Clubmen


Something a little out of the ordinary this post.  I completed this mob of Clubmen only this morning and I couldn't wait to get some pics of them up on-line today.  They have jumped the queue somewhat as I was going to put pics of Sir Ralph Hopton up! Next time for him perhaps.


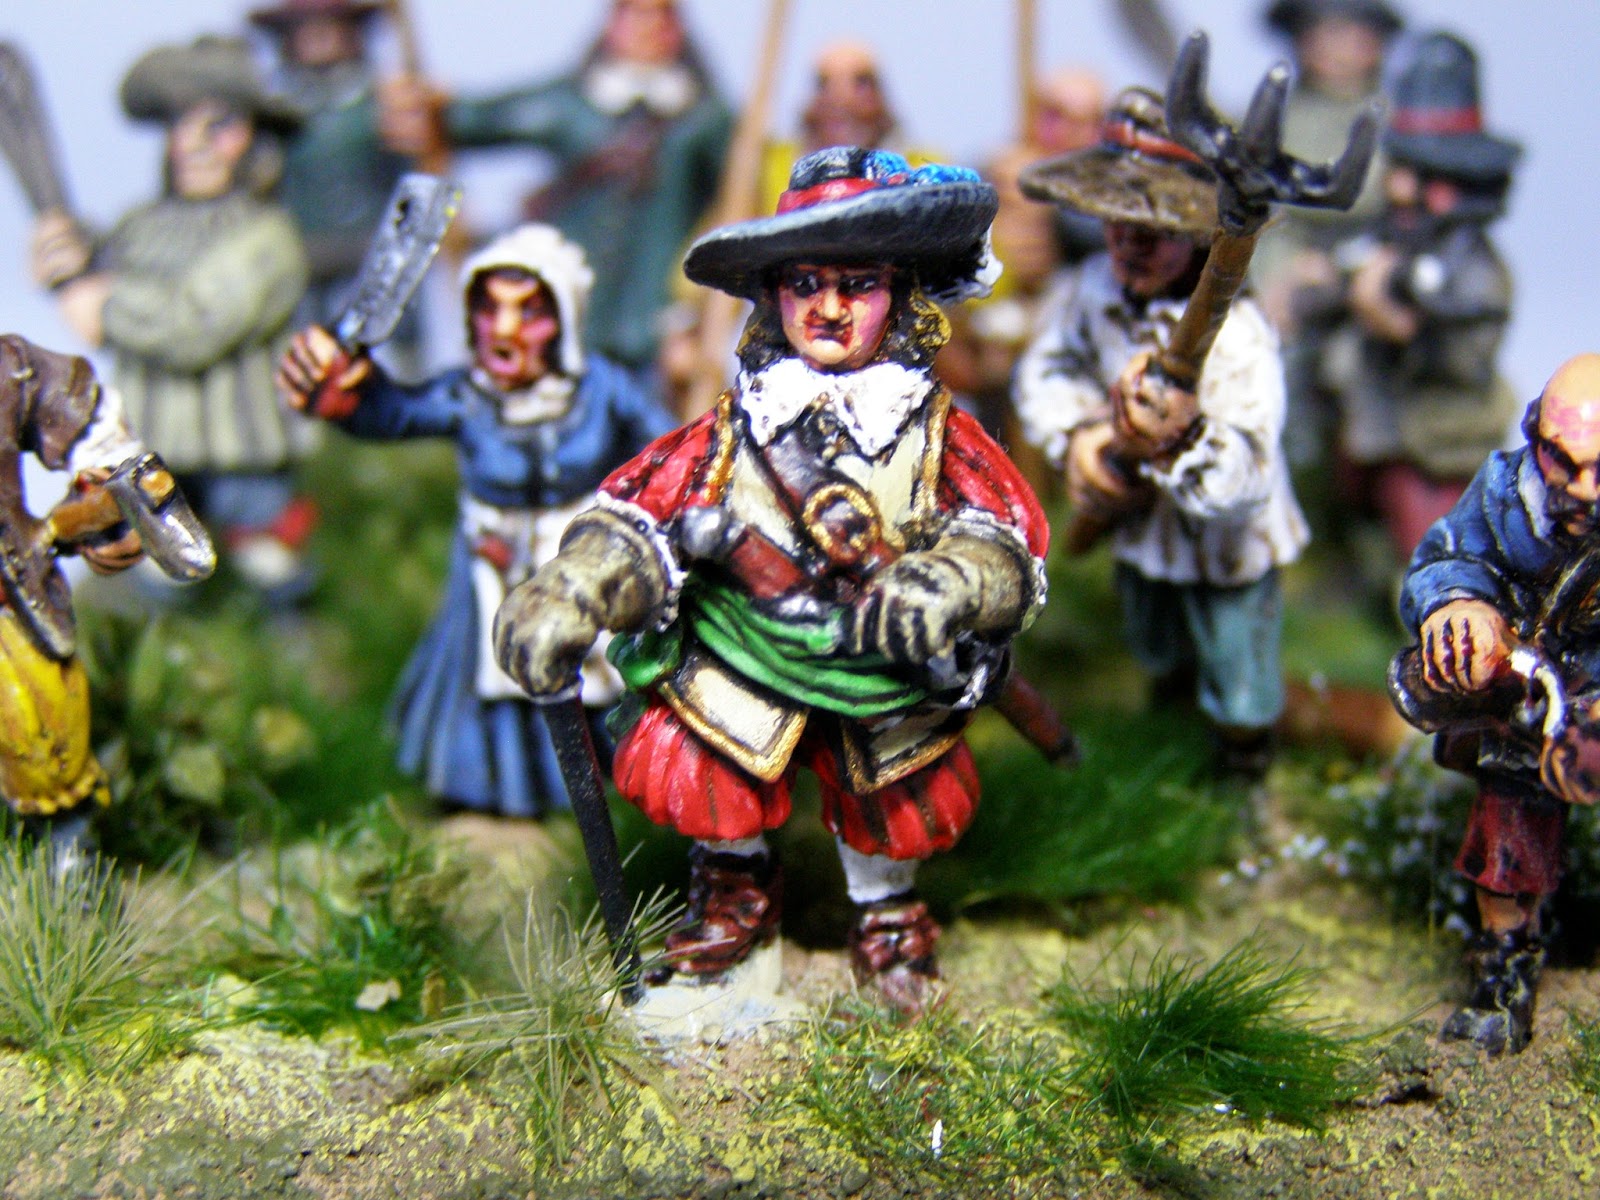
These figures are a mix of Wargames Foundry figures that I painted around 15 or so years ago and Warlord Games clubmen figures.  I wanted figures that I could mix with my old Foundry chaps, so I went with Warlord because they fit in better than the others and also looked great fun. They are somewhat bumpkin-like with a comical charm about them.  They seem to represent an angry assortment of villagers quite nicely, providing a suitable mix of age ranges, weaponry and perceived IQ (much like a village I once lived in!).  They are led by their local grandee who no doubt feels he is doing the right thing in taking charge, due to his social rank, but also probably knowing that they would have gathered whether he was there or not!  At least his reputation will remain intact!

"If you plunder or take our cattle,
be assured we will bid you battle"
(From contemporary Clubman Banner)


The Clubmen were formed in local defence 'clubs' (named so because of that and not because some may have carried clubs...ignore Wiki in this case).  A whole variety of ad-hoc weapons would have been carried, along with fowling pieces and no doubt, muskets and pikes from trained bands armouries, and the private collections of their social betters, as well as from deserters, the fallen etc.


Clubmen tried to be a neutral force to protect their homes and families in the areas where they lived.  Sometimes this did mean becoming allies of one of the local sides.  Across England it tended to be the Royalists who robbed and oppressed the locals and pushed them into taking up arms. 12,000 Clubmen gathered to besiege Hereford after depredations by Hereford's governor, the Royalist Sir Barnabas Scudamore.  In the West country, the Royalists frequently had to contend with fighting bands of Clubmen.

"...And up yours too!!!"

Cromwell had some difficulty with Clubmen in Dorset.  He showed his leadership skill by going on the offensive immediately against them and preventing the Clubmen from gaining confidence and spreading their power.  Cromwell's view once he had defeated a large force was: '....and we have taken about 300, many of which are poor silly creatures, whom if you please to let me send home, they promise to be very dutiful for time to come, and will be hanged before they come out again.'


As you can see there are some real characters amongst this lot and they were so much fun to paint up.  If you are interested in reading further about the fascinating history of this ad-hoc group of organisations which was capable of changing the balance of power in their localities then the following websites might be of interest:

 http://www.british-civil-wars.co.uk/glossary/clubmen.htm

www.southwilts.com/site/My...by.../Dorset%20Clubmen.doc

I used some snippets of the above in my research.


Tomorrow brings forth another dilemma....I'm off to the 'Overlord' wargames show at Abingdon tomorrow.  Will I be tempted by new things? Will I carry on my ECW collection or pause?  I started the major ECW re-vamp back in May (or there abouts) and I keep dipping into making shopping lists for other periods.  I have a large number of different periods which I never quite a got a 'playable' army for. A little bit of focus here and there and I can get them like my ECW collection. It's a dilemma but a nice one.  We must surely have one of the best hobbies there is. :-)  I'll post up the last of my pics of the clubmen for now.


"There be bogies at sixxe of the hour" (!)