Showing posts with label Wargaming. Show all posts

Tuesday, 10 May 2016

Battle of Edgecote - 1469


Being interested in so many periods of history means that I usually go in cycles of interest in different periods of history. Sometimes this cycle will last a few weeks for one era, or several years.  It is often thus the case that I can pretty well read up on a period of history but when I next come back to it, I find I have forgotten much!

...And this is where this particular battle comes in! A mere 30 miles or so away from me is a battlefield that I have never visited. It is the site of the Battle of Edgecote, an important battle in Wars of the Roses, that saw Kind Edward IV being strategically wrong footed, his forces beaten and his royal person being captured by the 'Kingmaker' himself, the Earl of Warwick.

When I was last in my 'Wars of the Roses' phase I purchased an excellent book called 'Where both the Hosts Fought' by Philip A Haigh, on the subject of the battles of both Edgecote and Lose-coat Field.  I read it from cover to to cover at the time, but when Ian, my long-time wargaming opponent suggested taking time to visit the battlefield recently, I realised that I had forgotten everything about the battle and some serious revision was needed.

This weekends game was planned to be a Wars of the Roses battle. I decided to go for the the Battle of Edgecote, after all, what finer way of revising is there than trying to recreate a battle on the tabletop!

The Scenario - Overview

It is 26 July 1469. Warwick has fallen out with Edward IV over his secret marriage to Elizabeth Woodville and the resulting influence of the Woodville family at the royal court.  Warwick's agent's have spread the rumour through England that Edward is a bastard and that Clarance, his brother, is the true heir of York.

A 'Robin of Redesdale' (almost certainly a Neville captain, either Sir William or Sir John Conyers) has started an open rebellion in the North. King Edward has mustered a small force but was shocked to find he was outnumbered by the rebels and so retreated to Nottingham to await the Earls of Pembroke and Devon from the South.

The rebels in the meantime have headed south to meet up with Warwick. Both Redesdale (Conyers) and Pembroke/Devon had collided with each other and after skirmishing, the latter have fallen back to a defensive position on Edgecote Hill.


Royal Forces - Briefing

You are the Earl of Pembroke. You expect to take on the rebels in the morning but hope that the Earl of Devon will make haste to join you. An unfortunate argument over billeting has meant that Devon has taken his force 10 miles away to find billets.

Devon will arrive behind your position from Game Turn 3.  An escalating dice roll will decide when he actually arrives.  ie. GT3 - need a 1, GT4 need a 1 or a 2....etc etc.


Royal Forces - Order of Battle

Earl of Pembroke

1 x unit of Billmen/Men at Arms combined
1 x unit of Welsh Spearmen
1 x SMALL unit of mounted Men at Arms
1 x Medium gun
1 x TINY unit of archers (Devon has got the greater majority of the archers with him!)

Earl of Devon (Reinforcements)

1 x unit of Billmen/Men at Arms combined
1 x unit of warbows
1 x SMALL unit of handgunners

Rebel Forces - Briefing

You are 'Robin of Redesdale'.Your rebels have performed admirably already but you know that battle is expected in the morning.  You are aware that the Earl of Devon is in the vicinity and may make his way to the battle. You are unconcerned as you are expecting the vanguard of the Earl of Warwick's army to reach you soon.

The Vanguard will arrive from the direction of Culworth on GT3 on an escalating dice roll.

GT3 - a 1 or 2 is needed etc (a better chance of arriving than Devon as per the real events)


Rebel Forces - Order of Battle

Robin of Redesdale (Conyers)

1 x unit of Billmen/Men at Arms combined
1 x unit of warbows
1 x unit of Levy Billmen
1 x SMALL unit of handgunners
1 x Medium gun

Earl of Warwick's Vanguard (led by John Clapham)

1 x unit of Billmen/Men at Arms combined
1 x unit of warbows


Objectives:

Destruction of the enemy force within the alloted timescale (ie. it gets so late fatigue takes over!) Any other result is a draw resulting in Warwick and Edward doing battle the next day.

Note for my readers: Edgecote sadly has a lot of conflicting information in the primary sources about this battle. Like so many medieval battles, numbers involved are not known though estimates and rough compositions can be guessed at. The absence of bowmen in Pembroke's force is noted upon (however I have given a tiny force of them to Pembroke just to stop the fire-fight all being one-way!).  The composition of the rest of the forces are my own devising. I have included guns and handgunners just to add further interest.


The After-Action Report

One thing I should mention - I have had to improvise and make do with the forces I have got utilising other units to fill in for Pembroke etc so don't be surprised to see Edward's livery and flags etc amongst the units - It would take me a very long time to prepare all of the contingents for each commander correctly!  Rules used are the superb 'Hail Caesar' rules with a number of in-house modifications and others gleaned from the web.

Anyway to action!


Game Turn One

We took a card from a 15th century (replica) pack of playing cards to see who went first. I played the part of Robin of Redesdale and the Rebels.  Ian took the part of the Earl of Pembroke.  Redesdale won the first move.

With the rear of my main force too close the river for my liking I decided to send my centre unit to charge uphill to force an immediate action.  I also wanted to do as much as I could before the Earl of Devon arrived.  My charge didn't quite reach the battle line but was several inches short of making contact. My archers unleashed a volley of arrows at the tiny bow unit opposite and the battle was on!

Pembroke decided not to remain inactive and charged down the hill to smash into Redesdale's main force as they charged up.  Holding the advantages of charging and being uphill this combat resulted in a victory for Pembroke. Redesdale's men survived the break-test and hung on desperately trying to maintain their footing on the slope.

A closer view from Pembroke's right flank at the top of Edgecote Hill


The action has started in the centre - Redesdale has advanced up the hill
to be charged in their turn by Pembroke going downhill


The desperate battle as both forces clash in the centre

Game Turn 2

Things rapidly go badly for Redesdale - the charge in the centre comes tumbling back, breaking and running!  One positive thing is that Redesdale wins the archery duel against the tiny unit of archers.
In desperation Redesdale launches his levy billmen on his right flank against the Welsh Spearmen. The billmen are supported by a unit of handgunners who assist in wearing down the Spearmen quite rapidly. Pembroke's Welsh spearmen retreat in good order....looking mean and full of fight and facing my troops.  I couldn't help feeling at this stage, that without my centre, the end was going to come quite quickly for Redesdale.

Redesdale's bows - turning Pembrokes few bowmen into porcupines 


 Behind the bowmen we can see the large gap in the centre 
freshly created by Pembrokes main battle


 A view of Pembroke's victorious centre battle at the foot of Edgecote Hill. Behind them 
is the battle between the the Welsh Spearmen and the Levy Bills of Redesdale


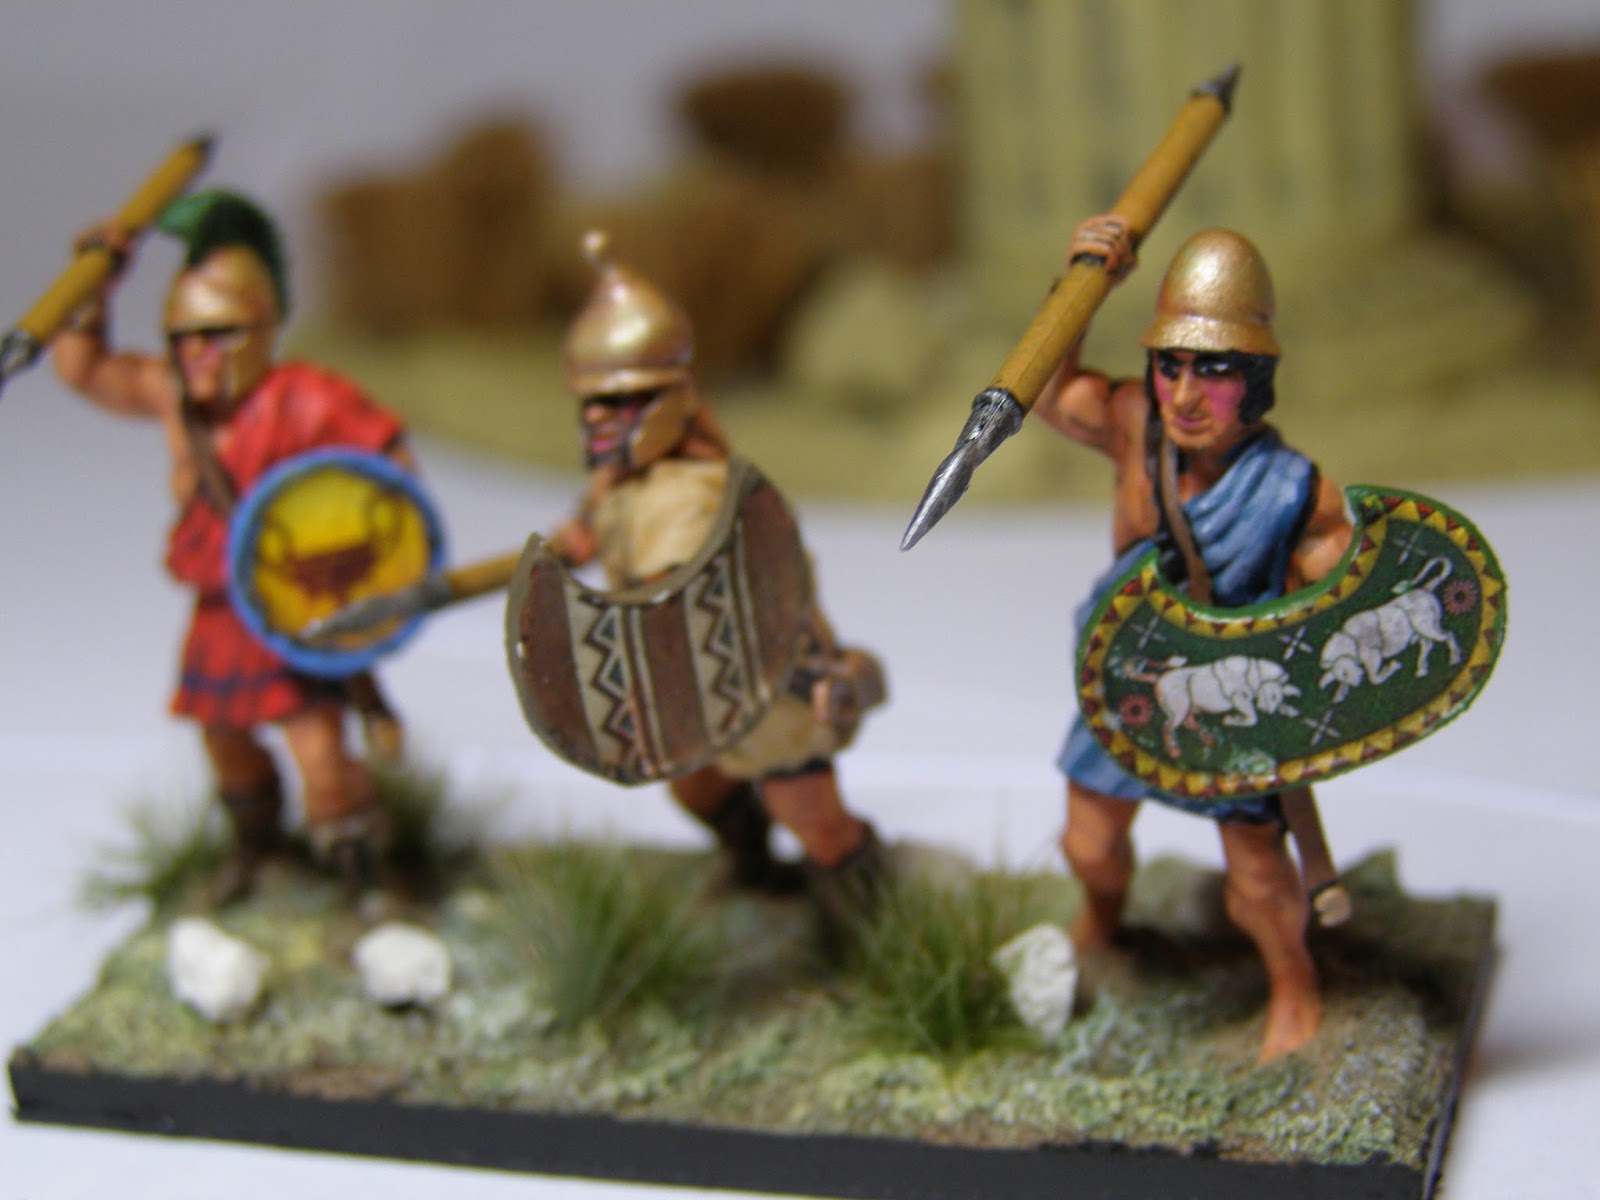
Redesdale's Levy Billmen - a determined body of men


Game Turn 3

At last - I get to throw for reinforcements - a 3 - darn no luck!
I throw the Levy Billmen against the Welsh Spearmen again - more success - this time the spearmen retreat disordered - I send the billmen in pursuit who stay in contact, no doubt hacking down their retreating foe in a horrible fashion.
Artillery fire is directed at Pembroke's previously successful centre. This combined with arrows raining down upon them cause casualties and disorder preventing them for accepting any orders.
Pembroke throws for reinforcements from the Earl of Devon - no luck there! Devon is clearly taking his time marching from his distant billets. Redesdale realises that there is a chance to pull back victory from defeat - but it could still go either way!

 The view from the top of Edgecote Hill - Pembroke's artillery occupies the top
whilst his centre remain at the bottom of the hill that they successfully threw the enemy from


 Another view but this time we can see the artillery in the top left and the bows to the top right
which were making life uncomfortable for the infantry, whittling them down and causing disorder


Game Turn 4

Redesdale dices for reinforcements - success! John Clapham arrives on the board leading men in Warwick's livery to cause consternation to Pembroke's men.  Redesdale's Levy Billmen finish off the Welsh Spearmen with no mercy.

Pembroke's previously successful centre is still without order and being helplessly shot to pieces to the point of becoming shaken.

Pembroke's cavalry, previously kept in reserve move down the road but the sight of Warwick's men in the distance deter them from advancing further.

At this point, with no sign of the Earl of Devon, the rapid march of Warwick, and the erosion of the remaining forces, Pembroke declares defeat.

 Pembroke's reserve cavalry receive their orders...but who is that with the 
ragged staff livery in the distance?


 Warwick makes his arrival, tipping the balance of the battle into the Rebel's favour


The longbowmen remain strong and un-shifting, unleashing doom to their foes 


...and talking of doom...! Casualties quickly started to mount!

I have to say that this was one one of the best wargames I have ever played, and I can't think of any bad ones of late so this must have been good!  It was great to play a game where the actions appeared to follow what happened historically (as far as can be ascertained from the sources!).  There was certainly no shortage of drama.  I'm really looking forward to walking the battlefield now I have a much better feel for what happened and where it happened.  I don't write a lot of After Action Reports as they are so time consuming but I felt that this one really had to be recorded. A wargame to remember!

Saturday, 13 June 2015

Greek Peltasts

At last!  Some time to do a blog post.  I had been quite pleased to get three posts done in April, but May was less good for my blogging!  I have done some painting though and I am pleased to have got several units painted up over the last couple of months.


These are the 28mm Victrix Greek Peltasts from the excellent 'Greek Peltasts, Javelinmen and Slingers' box. They really are great figures and I thoroughly enjoyed building and painting them all. Paints used were mostly from the Foundry triad range and which I am finding very pleasing to use.


I must say that it was hard to decide who were going to be the Javelinmen and who were going to be the Peltasts in the box.  Basically for me it came down to a question of basing to ultimately differentiate.  Peltasts seemed to me to be infantry who could fight formed or in open order and were happy to skirmish at distance or at close contact.  


I decided to base my Pelasts in threes so I could disperse them in Open Order should the need arise.  I saved the arms carrying multiple javelins for my Javelinmen (who I will post a pic of at a later date) who will fight in more open skirmish order and are based in two's.  There seemed to be some blurring of roles and kit between the two types of troop from the sources I read, but I now have light infantry and skirmishers so this suits me fine.


The stand above shows my command group for this unit.  Just small details to differentiate this stand; a trumpeter and a suitably heroic leader with smart shield design, striped tunic and Corinthian style helmet to set them off.


They have seen action twice now, not against another Greek City State but in the Roman Civil Wars between Pompey and Caesar as Greek allies.  With some more painting I may yet get a Greek Army painted up...alas I'm currently in 17th Century mode with a strange pull towards painting Napoleonics...no idea what is causing this other than a certain anniversary!

Tuesday, 10 March 2015

After Action Report - A Romans and Britons Encounter Battle


The figures came out again for another ancients battle at the weekend.  Unusually we have stuck with the same period of history for a 5th month in a row!  Both Ian, my regular opponent, and I are reading the same historical books at the same time.  The Penguin classics of 'The Gallic Wars' and 'The Civil Wars' have proved very inspirational.  The Caesarian Armies are still coming along and nearing completion so the Imperial Romans came out again - and that's no bad thing either!

We decided to go for an encounter battle.  The objective being the destruction of the opposing enemy army.  The key features of the battlefield gravitated towards the centre which encouraged swift movement (always helpful when time is limited!).


I'm using a mapping software programme for this map - I'm pleased to have discovered how to save it to my pictures file (note to self - select 'export' to blog pictures file and save as JPEG!). However, I cannot fathom out how to label the map yet with this software so I shall save that treat for another time.

The large green blob is the key feature - a large hill.  There is a road running from East to North bypassing the hill and between two areas of marshland.  Woods are dotted about.

It will suffice to say that the British Tribes are situated to the West (Blue) and the Romans are to the East (Red).  Infantry Divisional symbols are shown but the armies broke down into 3 x brigades each side (forming the division).  Cavalry, Chariots and Scorpions also added to the discomfort of the foot-sloggers.

Ian and I both diced for command ratings.  Ian's Roman General was an excellent 9 with both Brigade Commanders a sound 8.

My Britons suffered some bad dice luck with command ratings.  My general was 7, with one Brigade commander a 7 and fortunately my cavalry/chariot brigade commander an 8 (phew!).

We diced to see who went first and the Romans won 6-1.  My dice seemed to have been cursed by the Roman priests!


This photo can hopefully be orientated to the map.  Note the hill, road and marshes to the North.  My Britons have deployed to the west.


We used Hail Caesar rules for this game.  I have plans to use 'To the Strongest' for my current painting project (10mm Caesarians) (one Legion nearly painted already- hurrah!)

Anyway, I digress...

Game Turn One saw the Romans make a general advance.  The Britons started to suffer straight away from their poor command ratings and my orders didn't reach any of my troops - so no movement for me!

Game Turn Two saw the Romans advancing all across the board.  This was looking bad for me already! I managed to deploy my chariots and cavalry on my right wing.  I saw Ian deploying his cavalry down the road at the North of the board but I didn't want to be distracted by them.  My mobile brigade deployed at the southern end and aimed for the Roman Auxiliary Brigade.  I needed to hit his lighter units before his Legionaries deploying in the centre did the real damage.


Game Turn Three saw the Romans drawing ever closer and I was only just getting on to the board with my tribal infantry. You can see Ian's cavalry taking a wide sweep to the North on the road.  I really want to take that hill and not be diverted by cavalry from my objective.  Ian was deploying skirmishing archers and Scorpions onto the hill on this game turn.  Even the Legion had secured the southern end of the hill - a worrying development.  My tribesmen had ignored their orders for too long and it looked like I was going to get boxed in.

British Cavalry and Chariots about to make a triple move charge against the Auxiliaries 


Drawing in towards my centre. A solid mass of Legionaries 


 My British tribesmen.  Looking scary but refusing orders to advance!


 A view from the north of the Roman Cavalry heading at speed along the road in column

A view from behind the Roman lines - note one of the British tribes angled against the threat of the cavalry.  Please ignore the undercoated in black Roman General.  We needed another commander and this one is still not finished!


At least something's moving for the Britons!  A triple move charge crashes into the Auxiliaries 

The British cavalry push back the opposing Auxiliary unit and follows-up!  First melee success to the Britons!  After the initial inactivity from poor command rolls this was an unexpected success!

Game Turn Four saw the Romans mostly static put putting pila and scorpion bolts down range.  The British cavalry force beat back the Roman Auxiliaries again, who go off the table and are thus broken as a unit.  Things are looking up!

Game Turn Five and Six, however, changes things!

The Legion are content to halt and block my tribesmen in. The reason for this holding action becomes clear soon enough! 


 The Auxiliary cavalry gain a triple move and form into battle line and charge my flank. I have little choice but divert troops from my centre to shore up this flank or my tribesmen will be surrounded


Game Turn Six sees the Roman Legion spot the crucial moment of the battle.  Both of the Britons flanks are under pressure and the centre has to be weakened to fight on the flanks.  The Legion charge! 


This is where things went wrong on the British right (the south on the map).  The chariots were beaten off in melee and this was followed by the cavalry being made to retreat disorganised (ubiquitous cotton wool) as they were charged in their rear and unable to turn to meet the threat.  The retreat move could not be completed because their was a battery of scorpions I had been hoping to charge to kill easily.  Alas as the retreat was blocked by them, my unit disintegrated. So the fortunes of war changed so rapidly.


The victorious Roman cavalry prepare to charge another unit 

 Another view of the action in the centre


 I couldn't get the tribesmen to charge up the hill due to poor dice rolls and disorganising fire.  The Romans did a great job of pinning the troops down while I had to pull back supporting units to prepare to receive cavalry from the flank 


Two tribes take on three legionary cohorts - the end is nigh!

At this point I conceded the game.  Both flanks had caved in and the Legion had bided their time, squeezing in the centre until they finally added their weight. As I weakened my centre to push out to protect the flanks the charge was always going to succeed.  I could see the situation developing but there was little I could do to change anything.  The end was inevitable.  Ian had fought a textbook action and the victory for his Roman's was total!

All in all a very enjoyable game.  This was especially pleasing as the previous two games had thrown up quirks.  I haven't written those games up but the improvements have been implemented into my copy of the rules.  

One of those games did involve a river crossing where neither of us could get our troops to find the fords in the river by pulling out a sequence of just two playing cards (one beating the other).  In the end our troops just stood on their respective banks and hurled stuff at each other as they just could not cross.  Amusing but not the best outcome for an ancients game.  This was just really really unlucky and not a reflection on the rules.

The other odd game threw up a rules quirk.  When shooting at an enemy in Hail Caesar, 6's on a D6's cause a throw to be taken on a Break Test chart.  This threw up an extreme case where a fresh fanatic warband was stopped in its tracks by a tiny skirmish unit of archers who made them retreat (without inflicting a single casualty!).  This seemed to both of us to be very unsatisfactory and I searched on the internet to see if anyone else had modified the rule on this.  I was very happy indeed to find this:

http://blenheimtoberlin.blogspot.co.uk/2015/01/black-powder-modified-hail-caesar-break.html

Bill's solution is absolutely perfect! I use this table now instead.  Disorder is caused by 6's on D6s (like Black Powder) but break tests are now only thrown if the hit unit is already wobbly with shaken morale when it is shot up. What a great solution and it played really well too! The only difference to this sheet we have made is that we do count the difference in casualties between the two sides in melee as deductions from the break test throw of 2D6.

This will be the last game until April and I will still be happy to get the Roman's out again next time as they always look great on the table. Maybe the Caesarians will be ready...!

Saturday, 27 December 2014

Big Harry Scutum's Holding Action


In this battle a Roman vexillatio of 3 x cohorts of Roman legion under the command of Maximus Horatio Scutum (known to the Britons as 'Big Harry') has to fight a holding action whilst awaiting reinforcments.

Maximus Horatio (Big Harry) Scutum says: 'Oi, I haven't even had my tea yet!'


I was the commander of the Romans this month as I had commanded the great lime-washed in the previous game.  Ian commanded the Britons.

Scenario

The Roman raiding detachment of 3 x cohorts has found that their punitive raid on the local tribal villages of the Catuvellauni is not going to plan.  The last few villages have been deserted and as the Romans form up in a clearing they are aware of the sound of drumming of shields and the racket of horns being blown in the woodline opposite them.  The drumming and hornblasts grow louder and the legionaries look around nervously as the noise reaches a crescendo.  Maximus Horatio Scutum, the experienced vexillatio commander reacts quickly - sending off riders down both directions of the military road to summon local reinforcements.  Will the reinforcements come in time to prevent their destruction?

Rules used are 'Hail Caesar'.


My first effort at making a map. This was done with Powerpoint - hopefully one day I'll use the software which I found with the 100 page manual but in the meantime this will do!


Roman's Briefing
You have 3 veteran cohorts as well as a battery of scorpions.  You know there are local auxiliary detachments nearby who can help they will be thrown for from game turn 2.  They will arrive on an escalating role equal or below the game turn number.  ie. 1,2,3 on  D6 in game turn 3, 12,3,4 on game turn 4 so by game turn 6 they will arrive. You don't, however, know the strength of the reinforcements or from which direction they will come from. Big Harry Scutum has a command grade of 8.

Briton's Briefing
Wipe them out.  Turn the tables on the punitive raiding force and defeat them before the reinforcements overwhelm your own forces, Of course you can take on the reinforcements and beat them too.  Should you decide to withdraw your army at any stage with no broken brigades a draw can be claimed.

You have 3 x Brigades:

Brigade 1:   2 x Warband units, 1 x Slinger unit   Commander graded a solid 8.

Brigade 2:  1 x Cavalry unit, 1 x Chariot unit.  Commander graded a solid 8

Brigade 3:  2 x Warband units, 1 x Fanatic (naked!) Warband.  Commander graded an excellent 9


Hopefully this relates to the map clearly enough. This is taken from the left side f the board (left side of map.  Road and hill should assist orientation

Game Turn 1

The Britons deployed their forces from out of the woodline (Ian's edge of the board).  The Roman vexillatio stayed put and put down Scorpion fire.  The bolts tore into the chariot unit causing them to test and making the unit hold their ground.  Any units held up were going to be very helpful for the Romans in staving the Britons off until reinforcements arrived.  No reinforcement throw permitted in this turn though!

Scary noisy buggers with much lime-washed hair

Game Turn 2

The Britons advance their right wing, presumably to allow all their units to hit at once.  The fire of the Scorpion battery scythes into a unit of warband, halting them for the next turn in confusion.


Maximus Horatio (Big Harry) Scutum directs his men to the Military Road

'Watch your left!'

Scorpion fire rips through shields and warband alike

Game Turn 3

The Britons advanced across the board, slowly and for them, steadily.  The Britons left warband brigade was delayed by the tree copse which it had to negotiate.  To allow room for being pushed back. Big Harry Scutum ordered his men to advance up to the military road.  This would also assist in allowing reinforcements to reach them quicker.  A round of pila are launched at the Briton's light cavalry who allowed themselves to get too close.  The pila force the cavalry to retreat.  The Legion commander thought this a satisfactory outcome - so far the whole British tribe was failing against his small vexillatio.  The reinforcement throw was not so good however.

'Prepare Pila!'

Game Turn 4

An advance to contact is made as a Catuvellauni warband charge the Scorpions who had been so troublesome in the early game turns.  The Scorpions and crews are completely destroyed.  The charge of the chariots is beaten off and they pull back together with their supports.  The throw for reinforcements is again a fail - needing anything but 5 or 6 the Romans throw a 6!

The demise of the excellent Scorpions

The courageous charge of the chariots as they are bloodily repelled

Game Turn 5

The battle is now desperate. The Romans had hoped to have bought enough time to gain assistance from their reinforcements before a general engagement took place.  The full weight of the warband attacks now pin the legionaries along their line.  One cohort is pushed back but on the plus side one warband is completely broken. Casualties stack up everywhere with units reaching shaken status up and down the line.  The Roman vexillatio has held magnificently and surely the reinforcements will arrive now to save the day.  Anything but a 6 will lead to their arrival.  The throw is a......6!

 The battle is desperate as the Romans hold on for their lives

...and they are fighting well - a warband bounces back in disorder 

...But the weight of the unrelenting attacks takes it's toll.  The red cohort is forced back, disordered.  The line starts to waver!  

Maximus tries to keep the orange cohort in line

'Hold them....Hooooold them!!!!' The legion are pushed back.

Game Turn 6

The chariots rally and charge back into the fray.  The wavering red Roman cohort  break and flee. The yellow legion which had done so well are forced back.  The orange cohort fights bravely on winning their combat but warbands are now steaming in from their flank.

Oh good news...The reinforcements now automatically arrive...but alas too late. The reinforcements are two units of auxiliary foot and one of cavalry, not enough to repel the Britons - not on their own anyway.

Outflanked! The brave yellow cohort has a horde of warband steaming in on its flank!

An overhead view of the impending disaster

Desperate fighting, but breaking point is moments away...

Here they come - right in from the side

'This is just like the film '" Bridge Too Far"...we are XXX Corps and we get there just in time....oh hang on....!'  

The field clears as the Romans break

And there the game ended.  It really was an excellent game which we both really enjoyed.  The Romans clung on so well and appeared to actually look like winning the game on their own for a few minutes!  Alas they were whittled down in the end until they broke.  If only the reinforcements could have arrived sooner!  Though whether they were strong enough to take on the warband we can only guess.

The rules gave a superb game.  The legionaries are a hard target to break when attacked frontally and only broke when all the factors stacked up against them. The previous game got me back into the Hail Caesar frame of mind and it flowed much more quickly this time.  A few less units this time also meant that I could focus on the detail of fewer actions rather than too many complicated actions. 

All in all - fantastic fun! I am currently painting up the magnificent Foundry 'Gaius Suetonius Paulinus' set hopefully in time for the next game.