Being interested in so many periods of history means that I usually go in cycles of interest in different periods of history. Sometimes this cycle will last a few weeks for one era, or several years. It is often thus the case that I can pretty well read up on a period of history but when I next come back to it, I find I have forgotten much!
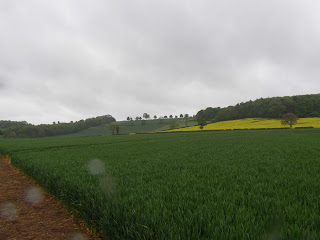
...And this is where this particular battle comes in! A mere 30 miles or so away from me is a battlefield that I have never visited. It is the site of the Battle of Edgecote, an important battle in Wars of the Roses, that saw Kind Edward IV being strategically wrong footed, his forces beaten and his royal person being captured by the 'Kingmaker' himself, the Earl of Warwick.
When I was last in my 'Wars of the Roses' phase I purchased an excellent book called 'Where both the Hosts Fought' by Philip A Haigh, on the subject of the battles of both Edgecote and Lose-coat Field. I read it from cover to to cover at the time, but when Ian, my long-time wargaming opponent suggested taking time to visit the battlefield recently, I realised that I had forgotten everything about the battle and some serious revision was needed.
This weekends game was planned to be a Wars of the Roses battle. I decided to go for the the Battle of Edgecote, after all, what finer way of revising is there than trying to recreate a battle on the tabletop!
The Scenario - Overview
It is 26 July 1469. Warwick has fallen out with Edward IV over his secret marriage to Elizabeth Woodville and the resulting influence of the Woodville family at the royal court. Warwick's agent's have spread the rumour through England that Edward is a bastard and that Clarance, his brother, is the true heir of York.
A 'Robin of Redesdale' (almost certainly a Neville captain, either Sir William or Sir John Conyers) has started an open rebellion in the North. King Edward has mustered a small force but was shocked to find he was outnumbered by the rebels and so retreated to Nottingham to await the Earls of Pembroke and Devon from the South.
The rebels in the meantime have headed south to meet up with Warwick. Both Redesdale (Conyers) and Pembroke/Devon had collided with each other and after skirmishing, the latter have fallen back to a defensive position on Edgecote Hill.
Royal Forces - Briefing
You are the Earl of Pembroke. You expect to take on the rebels in the morning but hope that the Earl of Devon will make haste to join you. An unfortunate argument over billeting has meant that Devon has taken his force 10 miles away to find billets.
Devon will arrive behind your position from Game Turn 3. An escalating dice roll will decide when he actually arrives. ie. GT3 - need a 1, GT4 need a 1 or a 2....etc etc.
Royal Forces - Order of Battle
Earl of Pembroke
1 x unit of Billmen/Men at Arms combined
1 x unit of Welsh Spearmen
1 x SMALL unit of mounted Men at Arms
1 x Medium gun
1 x TINY unit of archers (Devon has got the greater majority of the archers with him!)
Earl of Devon (Reinforcements)
1 x unit of Billmen/Men at Arms combined
1 x unit of warbows
1 x SMALL unit of handgunners
Rebel Forces - Briefing
You are 'Robin of Redesdale'.Your rebels have performed admirably already but you know that battle is expected in the morning. You are aware that the Earl of Devon is in the vicinity and may make his way to the battle. You are unconcerned as you are expecting the vanguard of the Earl of Warwick's army to reach you soon.
The Vanguard will arrive from the direction of Culworth on GT3 on an escalating dice roll.
GT3 - a 1 or 2 is needed etc (a better chance of arriving than Devon as per the real events)
Rebel Forces - Order of Battle
Robin of Redesdale (Conyers)
1 x unit of Billmen/Men at Arms combined
1 x unit of warbows
1 x unit of Levy Billmen
1 x SMALL unit of handgunners
1 x Medium gun
Earl of Warwick's Vanguard (led by John Clapham)
1 x unit of Billmen/Men at Arms combined
1 x unit of warbows
Objectives:
Destruction of the enemy force within the alloted timescale (ie. it gets so late fatigue takes over!) Any other result is a draw resulting in Warwick and Edward doing battle the next day.
Note for my readers: Edgecote sadly has a lot of conflicting information in the primary sources about this battle. Like so many medieval battles, numbers involved are not known though estimates and rough compositions can be guessed at. The absence of bowmen in Pembroke's force is noted upon (however I have given a tiny force of them to Pembroke just to stop the fire-fight all being one-way!). The composition of the rest of the forces are my own devising. I have included guns and handgunners just to add further interest.
The After-Action Report
One thing I should mention - I have had to improvise and make do with the forces I have got utilising other units to fill in for Pembroke etc so don't be surprised to see Edward's livery and flags etc amongst the units - It would take me a very long time to prepare all of the contingents for each commander correctly! Rules used are the superb 'Hail Caesar' rules with a number of in-house modifications and others gleaned from the web.
Anyway to action!
Game Turn One
We took a card from a 15th century (replica) pack of playing cards to see who went first. I played the part of Robin of Redesdale and the Rebels. Ian took the part of the Earl of Pembroke. Redesdale won the first move.
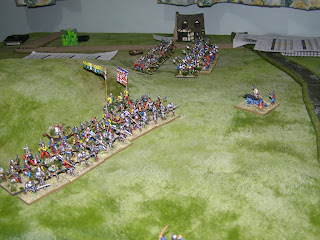
With the rear of my main force too close the river for my liking I decided to send my centre unit to charge uphill to force an immediate action. I also wanted to do as much as I could before the Earl of Devon arrived. My charge didn't quite reach the battle line but was several inches short of making contact. My archers unleashed a volley of arrows at the tiny bow unit opposite and the battle was on!
Pembroke decided not to remain inactive and charged down the hill to smash into Redesdale's main force as they charged up. Holding the advantages of charging and being uphill this combat resulted in a victory for Pembroke. Redesdale's men survived the break-test and hung on desperately trying to maintain their footing on the slope.
A closer view from Pembroke's right flank at the top of Edgecote Hill
The action has started in the centre - Redesdale has advanced up the hill
to be charged in their turn by Pembroke going downhill
The desperate battle as both forces clash in the centre
Game Turn 2
Things rapidly go badly for Redesdale - the charge in the centre comes tumbling back, breaking and running! One positive thing is that Redesdale wins the archery duel against the tiny unit of archers.
In desperation Redesdale launches his levy billmen on his right flank against the Welsh Spearmen. The billmen are supported by a unit of handgunners who assist in wearing down the Spearmen quite rapidly. Pembroke's Welsh spearmen retreat in good order....looking mean and full of fight and facing my troops. I couldn't help feeling at this stage, that without my centre, the end was going to come quite quickly for Redesdale.
Redesdale's bows - turning Pembrokes few bowmen into porcupines
Behind the bowmen we can see the large gap in the centre
freshly created by Pembrokes main battle
A view of Pembroke's victorious centre battle at the foot of Edgecote Hill. Behind them
is the battle between the the Welsh Spearmen and the Levy Bills of Redesdale
Redesdale's Levy Billmen - a determined body of men
Game Turn 3
At last - I get to throw for reinforcements - a 3 - darn no luck!
I throw the Levy Billmen against the Welsh Spearmen again - more success - this time the spearmen retreat disordered - I send the billmen in pursuit who stay in contact, no doubt hacking down their retreating foe in a horrible fashion.
Artillery fire is directed at Pembroke's previously successful centre. This combined with arrows raining down upon them cause casualties and disorder preventing them for accepting any orders.
Pembroke throws for reinforcements from the Earl of Devon - no luck there! Devon is clearly taking his time marching from his distant billets. Redesdale realises that there is a chance to pull back victory from defeat - but it could still go either way!
The view from the top of Edgecote Hill - Pembroke's artillery occupies the top
whilst his centre remain at the bottom of the hill that they successfully threw the enemy from
Another view but this time we can see the artillery in the top left and the bows to the top right
which were making life uncomfortable for the infantry, whittling them down and causing disorder
Game Turn 4
Redesdale dices for reinforcements - success! John Clapham arrives on the board leading men in Warwick's livery to cause consternation to Pembroke's men. Redesdale's Levy Billmen finish off the Welsh Spearmen with no mercy.
Pembroke's previously successful centre is still without order and being helplessly shot to pieces to the point of becoming shaken.
Pembroke's cavalry, previously kept in reserve move down the road but the sight of Warwick's men in the distance deter them from advancing further.
At this point, with no sign of the Earl of Devon, the rapid march of Warwick, and the erosion of the remaining forces, Pembroke declares defeat.
Pembroke's reserve cavalry receive their orders...but who is that with the
ragged staff livery in the distance?
Warwick makes his arrival, tipping the balance of the battle into the Rebel's favour
The longbowmen remain strong and un-shifting, unleashing doom to their foes
...and talking of doom...! Casualties quickly started to mount!
I have to say that this was one one of the best wargames I have ever played, and I can't think of any bad ones of late so this must have been good! It was great to play a game where the actions appeared to follow what happened historically (as far as can be ascertained from the sources!). There was certainly no shortage of drama. I'm really looking forward to walking the battlefield now I have a much better feel for what happened and where it happened. I don't write a lot of After Action Reports as they are so time consuming but I felt that this one really had to be recorded. A wargame to remember!


