Showing posts with label British Infantry. Show all posts

Friday, 2 June 2017

AWI - 1st Foot Guards 1781

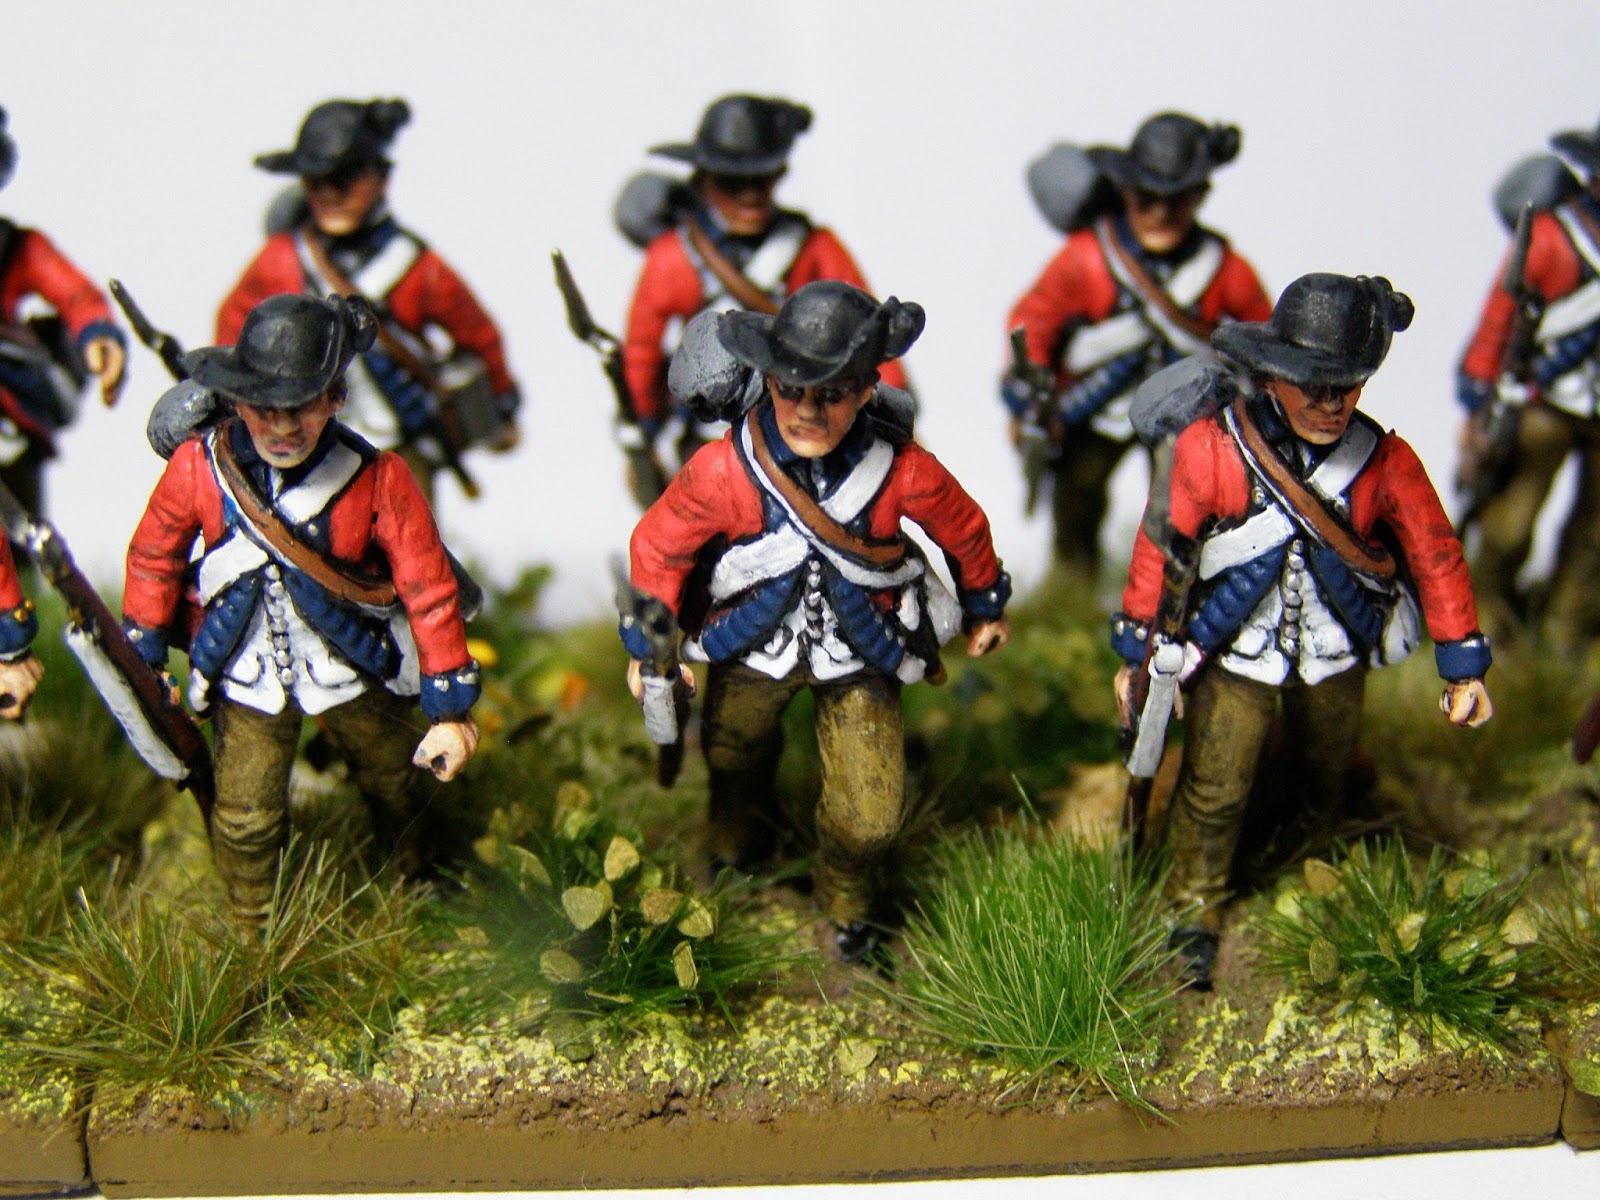
It's American War of Independence time again.  I really enjoy painting figures in the fine uniforms of this period.  In this instance the uniforms are heavily modified and result in a very purposeful and practical uniform which equipped the 1st Foot Guards ready for the Southern Campaign and Guilford Courthouse


Lord Cornwallis ordered that both of the Guards Battalions wore brown trousers for this campaign which give a nice contrast to the colours I normally use.


The 1st and 2nd Foot Guards in America were formed of detachments sent from Britain rather than a whole regiment deployment, so the Colours remained behind in Britain.


Lace was removed for the campaign and added to the much more practical appearance of the men - far better for woodland fighting too.


The figures are from the wonderful 28mm AWI British Infantry set in plastic by Perry Miniatures. The options in this box are superb with the different headgear and arms to create two poses.  I opted for this battalion to be advancing carrying muskets at the trail.


I painted quite happily over the lace on these miniatures, any shape detail of the lace showing on the tunics seems to convince the eye that it was the darker hue of the fabric below the removed lace.

More difficult was the drummer.  The lace on the sleeves is well pronounced on this figure and I really didn't want to carve the lace off and make a mess of it.    I also thought that the sheer cost of drummers coats would make the Colonel blanche at the thought of hacking them about.  Surely it would be beneficial in action if the drummer was identifiable to the commanders too?  These reasons were sufficient for me to retain the lace just for the drummer...I hope I don't know come across a primary source saying that their lace was removed too!


I hoped to paint another AWI battalion straight after this one, but I do find that I'm wiped out after the amount of detail that I like to put into these and then I need a change. Something completely different (or at least later in date!) is up for posting as soon as I finish them!

Tuesday, 26 July 2016

WW2 British Infantry 15mm - DCLI


Seeing as I posted a WW2 Hawker Typhoon in my last blog entry, I thought I would follow up on the same theme.  These are probably the first WW2 British Infantry I have painted since splodging paint onto Airfix 20mm figures in my teenage years.


These figures are 15mm Flames of War figures produced in plastic.  I have to say that I was a lot more impressed with them than I thought I would be.  There is a lot of detail and character to the figures, without the figures being too 'cartoony' as seems to be the case with some 28mm figs.  They look purposeful and usable on the field.


WW2 Normandy is something that I have been wanting to do for 20 years. I bought a lot of 15mm Skytrex troops and tanks back in 1996, and in the boxes they sadly remained.  That dormant interest finally rekindled when I recently purchased a set of the PanzerGrenadier rules (2nd Edition).  All it took was driving down summer country roads, high hedgerows and seeing stone farmhouses and my imagination put everything together.


Things have changed of course in 20 years in our hobby as you will be well aware! We are so well catered for in WW2 figures and vehicles it is simply amazing.  One cannot help but admire the Flames of War range with this period.


Now for some odd reason, when I took these fellows out of the box and decided to paint them, I thought it would be a quick job. A splash of khaki, a few strokes of mid-stone on the webbing, flash tone, boots rifle and voila!   But it just didn't work out like that.  I ended up putting as much time in as I would have done had they been from a more colourful uniformed era.


For one thing, getting the light contrasts on the uniforms so that they looked right and did justice to the guys who wore them, became an interesting and enjoyable challenge.  I found myself really wanting to get the detail right.  Owning and shooting original Lee Enfields also meant that I found it impossible to scrimp on time and detail on the rifles. It became more a labour of love.....not something that I had intended!


I also drew on inspiration on a book that I have owned for 30 years 'Hill 112' by Major JJ How. This book written by an officer in the Monmouths who fought through the Normandy campaign is a remarkable insight into the ferocious battle for that Hill and it's box-shaped wood.  I remember in the early 1990's meeting my Great Great Uncle Charlie Savage from Cornwall for the first time.  He recounted to me his days in the Duke of Cornwall's Light Infantry.  His brother was at Hill 112 though he himself had been transferred to the Kings Regiment mid-war and found himself fighting throughout the siege of Malta.

As I painted these I couldn't help but think of Charlie and his brother and so I painted these figures up to represent the DCLI. On the upper sleeve of these 15mm figures is the Wyvern of the 43rd Wessex Division of which the DCLI were part. It is more of a representation of the Wyvern at this scale I should add...my skills are not that good!


Paints used were mostly from the Flames of War ranges but also Vallejo and Foundry.


Bases are MDF from Warbases.  I wanted something with slight curve instead of straight corners so that it wouldn't look as if I was forming Napoleonic line when my sections were alongside each other


A few more pics below..I'll stop my narrating for a bit....


I had a bit of dilemma in how best to represent the formations which make up the battalion.  For me it was all about accuracy and also knowing where I was up to as I built the Battalion up.  I really do want to know which Platoon is where and where the relevant commanders are on the field so they can keep in communications and lead the right sections.  I knew I had to label them up but the question was how.  I'm not a big fan of visible labels on bases but with MDF bases and very small print, I found that a small strip of info could be placed on the very rear edge of the base.  Because my playing mat has raised grass, it makes the label less obvious, a small push down of the grass and I can see exactly which unit is where.


On the underside of the bases (beneath the magnetic sheet) is more detailed information which I can pick up and look at should I really need to.


Handy for being accurate in what exactly is contained on support weapon bases when I can't remember my 2" mortar from my 3" (not a euphemism!).


Well, that might be all of my WW2 stuff for the time being. More colourful things will follow as I have been playing with colourful paint palettes after all that khaki!

Tuesday, 13 May 2014

AWI - British Infantry 33rd Foot (1st Yorkshire West Riding)


My second British AWI regiment is now finished.  This time we have the 33rd Foot who fought in the same brigade as the 23rd Foot at Guilford Courthouse.


I painted these troops in a completely different style to just about anything posted on my blog to date. I was inspired by a brief painting guide in Miniature Wargames April edition, which showed a figure of Commander Maude, the Beach Master of Juno Beach painted by Kevin Dallimore  This figure was basically wearing the standard British khaki battledress but the subtle shades applied over a black undercoat, getting lighter each time, was so effective. It really made me think in greater detail about the use of shadow in the early stages of painting and ways of adding light to get the contrasts. I bought the Kevin Dallimore Painting and Modelling Guide published originally by Wargames Foundry and a large set of Foundry paints (Napoleonic Colours) and set to work.


If you are unfamiliar with the techniques used in the book, Kevin Dallimore commences with painting the flesh tones first over the black undercoat, so you are essentially finish all of that detail first.  It was quite a surprise to find that I treated my entire painting process differently from the time I had a miniature with a fully detailed face looking back at me, even though everything else (bar hands) was still black!  I was really careful throughout the process not to put a brush-stroke wrong (though occasionally I did of course but it was easily touched up at the end).


The plus side to this was that shadows were left by the black undercoat where I carefully left space around the edges.  This would save a lot of lining in at the end.  The foundry 'Triad' system of three tones of colour getting lighter each time worked really well and meant that I didn't need to apply washes over base colours and then go back over them again. To this end, the new techniques really worked.  Detail was much improved and painting time was considerably less.


The downside was that the level of concentration from the beginning was huge!  I also became detail obsessed from the beginning rather than just dealing with fine detail in the later stages (as I used to do).  The Foundry paints are wonderful.  I really like them and the British redcoat red does seem spot on.  I did an extra layer of colour on the trousers so you are seeing 4 layers over the black undercoat.  I used 'Austrian White' shades but the final light coat seemed too grey for my liking.  I resorted to my usual Vallejo White to finish off the highlights of the white and this really brought out character of the stereotypical British Infantry in the AWI. Campaigning would no doubt make whites turn into off-white hues, but these are British Infantry after all and it just felt wrong not to make the white stand out with purity.


This unit took about three weeks of work compared to five weeks for my old method.  I did spend a lot of time each week painting these, but I also spent a lot of time revising for study work.  The hours per week probably therefore equalled each other between the previously painted unit and this one.  But two weeks were saved overall with this new method.


The figures are from the Perry's plastic range and are simply superb.  They can be assembled advancing like this as shown,or advancing at the trail position. They were a joy to assemble and the choice of headgear give them an awful lot of flexibility for use in different campaigns.  The flags are again from GMB.


So in conclusion, I think I'll stick with using the new technique.  I might do things differently if I'm painting ancients in white tunics (like Persians etc) where I would probably be inclined to use washes again. But for these AWI chaps, black undercoat and Foundry Triad system paints is the way forward I think. I'll definitely be getting some more of these Perry's plastics AWI figures, especially now that the Continentals are out.  I have some metals from the Perry's to paint first (study work permitting!) and I just can't wait to paint some more.


Sunday, 20 April 2014

AWI - British Infantry - 23rd Foot Royal Welch Fusiliers


At last, a start to my British Army for the American War of Independence.  This is the 23rd of Foot (Royal Welch Fusiliers).   My British order of battle will be based on the Guilford Courthouse campaign of 1781.


The figures are from the Perry's metal range.  I must have purchased these about five years ago and they have sat patiently awaiting painting all this time.  I managed to paint a couple of brigades of Continentals and Militia during my last AWI phase in about 2008. This was helped by recovery time post-surgery.  Probably the best thing about undergoing surgery is the necessary recovery period of taking it easy afterwards and those four weeks saw two full battalions of Maryland Infantry completed!


I painted these figures using my usual method of white undercoat, then base colours, dark washes to lowlight/texture, base colours again, and then highlight.  This is followed by lining-in and copious amounts of touching up (prior to varnishing and basing).  I'm happy with the finished result, but my goodness, it's time consuming.  I have just assembled a unit of the Perry's plastic AWI British Infantry which I have undercoated black.  My intention is to try the 3 step 'triad'-style method of Kevin Dallimore/Foundry (not that I have any illusions of getting to the same standard as Mr Dallimore!).  I just want to speed things up a little as I think I'm making my process unnecessarily complicated, and I don't have the time now that I did do.


Of course- changing to a new painting technique might end up being a longer process, but I'll have to see. Nothing ventured and all that!


The flags are by GMB and the paints used are mostly Vallejo acrylics with some Citadel colours and Miniature Paints (the fine blue).


A few close ups...


I have to say that it's a nice change from all the green armoured vehicles I have been painting.  As much as I enjoyed doing armour, it's hard to beat painting up a unit of red-coats for the sheer satisfaction of seeing the completed unit. Hopefully I will stick with doing AWI for a while, though the summer usually has me thinking about English Civil War battlefields or Normandy Hedgerows!