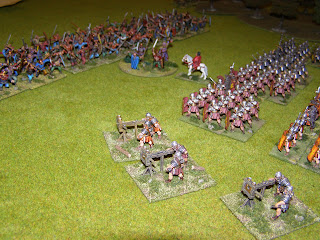
Rules used were 'Hail Caesar', a set which I have had for a few months and just have not been able to put down. My previous blog posts probably give a good indication of how much they have inspired me!
The board was not too cluttered with scenery. It's still early days as far as playing goes. This is the third game played with the rules and i'm still making mistakes but only one or two now.
Turn One
Please excuse the slightly odd angle - I was trying to get as much of the board in shot as I could. This shot was taken just after the advance of the Ancient Britons. I threw to go first and decided to go for it in the proper Celtic manner....charrrrrrge!!!! I also wanted those charge bonuses and to seize the initiative early on. For ease of reference I shall refer to North, Centre and South of the battlefield. North is the window end where the delightful floral curtains hang. Both forces were arranged in three divisions each. The Roman's having a particularly strong centre of 4 Legionary Cohorts and a unit of Scorpions.
A closer view of the centre of the battlefield. The scorpions are putting fire down on my chariots attacking on the Northern flank of the battlefield.
A view of the Ancient British advance on the Southern flank. This advance was hampered by orders problems and as a result advanced too slowly.
Turn Two
I sent my two chariot units hurtling in on the Northern flank. Ian countered with one unit of auxiliary cavalry. The battle here was fast and furious and very bloody. The result was that the auxiliaries and the front unit of chariots broke each other.
The remaining British force on the Northern flank. Only one unit of Roman Auxiliary Archers deployed in skirmish order stood between them and the Legionaries exposed flanks in the centre of the field.
The centre prepares for the coming clash!
Turn Three
The British Warband smash straight into the Roman Legion Line. Dramatic stuff!
The Army commanders throw their weight into the combats on both sides too. The outcome of this attack would have such a bearing on the whole battle. History says that attacking Roman Legion in this fashion was usually suicidal. However, when you have a big force of warband who are facing the Legion, you just don't want to sit back and wait for the Romans to come marching on. The temptation to just go for it and break that shield wall is just too great....
Though as Wellington was later to say...they came on in the same old way and they were beaten in the same old way...and that's just what happened to my Britons! The scorpions beat off one unit with accurate and very deadly fire causing a break test prior to the point of impact. The very central unit was broken and my Army commander wounded. My left unit of the central division was defeated and was then contacted in the rear by a sweeping advance by the Romans. This broke that British unit too. The only upside in the whole of the central combat was that the Roman Army commander was wounded also.
Turn Four
The Britons need to turn the battle around here and fast! With the centre broken they had to win on both flanks to have any hope of winning the battle, and to do it before they became engaged with the bloodied and victorious Legionaries.
On the Northern flank a charge by my chariots was finally made despite poor order throws. This tardy attack made contact with the Roman skirmishers. Breaking through should have been easy. But NO! The Roman's had some amazing dice luck and held, forcing the combat to continue into the next round.
On the Southern flank my division of Britons finally got moving properly and charged the Roman Infantry Auxiliaries. This attack was looking much better.
Turn Five
On the Southern flank my successful British division manage to break the Roman Auxiliaries, killing the Roman divisional commander. Now if I can just repeat the success on the Northern flank, I can pull victory out of defeat....But no, the skirmishers hold for another round of combat and keep my chariots hemmed in...
Ian moves his victorious Legion into the exposed flanks of the chariot unit. It's all over. The chariots are reduced to mangled wooden wreckage and bodies. My successes on the South flank at least save face for the Ancient Britons, and they flee the vengeful Roman Army to fight again another day. There is no escape from the scale of defeat though. Ian won a good victory, though it was only really certain in his move in Turn Five.
I think this is the third time Ian has won out of the three times we have played Hail Caesar...I still enjoy it though. The battles have all been hard fought and great fun with lots of laughing at some of those good and bad throws at just the critical moments. (Hang on, I've been beaten three times out of three games...it's Franco-Prussian War next time and I've got the spikey helmet on!). Actually I will get back to other periods sometime, but this one really has me hooked at the minute. We will have to see what is going to come off my painting table next!


