Monday, 16 September 2013

Black Powder - French Indian Wars Revisited

On 24th August Ian and I had another game of Black Powder for the French Indian Wars.


With the success of the previous game (and another which I have completely failed to write up!), we decided to have our third French Indian War game in a row (there is a 4th planned for next weekend!).  I think this is a good illustration of how much we are enjoying gaming this period with this set of rules.

Now I must confess to having been quite dull with my scenario setting for many years now.  I think the reasons for this were that gaming opportunities were rare until this year,and time minimal.  With these constraints  I tended to just set up the board for a meeting style engagement.  After having been inspired by so many of your blogs and your after action reports, I decided it was time I was a little more imaginative.  I was also encouraged by feeling very comfortable with the Black Powder rules and confident that we could reach a conclusion to a game within the 4 or 5 hours we had to play it in.

I decided to start with all figures off board to add an air of uncertainty.  Further, instead of having just the objective of beating the enemy's army, I set a simple scene around the forthcoming battle.

Scenario
A British supply column is approaching up the road which runs North to South up the board.  This supply column is intending to reach a fort up the road the following day.  The British have troops in the area who have been tasked with securing the area of the road, cutting trees and protecting the column.  The French with their Indian allies are already aware of the approaching column and have moved into the area. They intend to drive the British out of the area so that the supply column can be attacked.

The arrival of the first British Brigade in march column

Deployment
A British Brigade will enter from the North in march column and head down the road to the South. They have an artillery piece with them which through misfortune is having to be manually dragged.  The French are permitted to bring a 'light' brigade of Courier de Bois and Indians in the centre of the board in the woodland. Entry to the battlefield area for more brigades is only permitted by dice throw beating command values in following turns.

Forces
Three Brigades per side, with a variety of between 3 to 5 units Battalions per Brigade.  I should point out that Ian had painted some superb Seven Years War Russian Infantry this week and we both agreed that they should be allowed on the table.  They are French Infantry who unfortunately washed their white coats with some French soldier's green underpants - which caused a 'dye incident'. Hence greencoats on French side!

Rule Amendments
All of the previous rule amendments were adopted again, but with one more additional rule change to the normal Black Powder rules.
This time we said that charges can no longer be made on initiative by units within initiative charge distance of the enemy.  The reason for this is that it seemed bizarre for a unit which has been chewed up by musket/artillery fire to be allowed to automatically charge home.  Surely they must check for forward movement of some sort?  After all many history books do state that charges were frequently shot to standstill before melee contact was made - look at all those French column vs British line situations and those American Civil War Battles (ok better rates of fire etc I agree).  This rule change was very satisfactory and made a lot more sense.  We decided that a unit had to check for movement against its command value just as if it was going to make a normal movement.  However, retirement movement could be made on initiative as per the rules.

Game Turn One
The British advance slowly up the road.  French brigade is in the wood.  No other actions.

A slow but steady advance on Game Turn One

Game Turn Two
Not much action so far.  The French await developments before doing anything. The British move slowly up the road with the one brigade

Game Turn Three
The French deploy Montcalm's brigade in the centre and their last brigade right at the south end of the board.  Suddenly things are happening!

Montcalm's Brigade enter at the centre of the battlefield, threatening
 to cut the road almost immediatly

The two remaining British brigades deploy in the centre to try to rescue the brigade in march column.

Game Turn Four
The French central brigade cut the road and block the British march column.  All other French brigades march towards the action. The British realise their situation.  The march column halts.  A British brigade heading towards the French fails to move! This is bad news as the column is looking particularly vulnerable.


Game Turn Five
The French southerly brigade makes a triple move and starts to head towards the action.  For the British this looks critical.  The room for manouvre looks smaller and the French have taken the initiative in all areas.  The view of the battlefield seems to be shrinking already. Things could turn into a desperate holding action...unless something drastic is done quickly.
The British announce a charge in the Left centre...a great dice throw gives a triple move.  The British Louisberg Grenadiers and 78th Highlanders perform a wild bayonet charge on the Courier de Bois.  In the ensuing melee the Courier de Bois lose their 3 x stamina level plus an extra 4 men. This results in them being removed from the board. Standing to take a charge from Grenadiers cost the French dearly.

The desperate British bayonet charge destroys the Courier de Bois
 who flee through the woods and beyond

Game Turn Six
The remaining units in the French brigade deliver musketry and disorder both the Grenadiers and the Highlanders.  The British move up their central brigade to take on the French Northern brigade who cut the road earlier. The desperate British move to throw their men straight into the action to rescue the march column has had the effect of gaining local superiority of numbers...if the French Southern brigade can be delayed coming into the action.  The British march column try to extricate themselves from the road and withdraw into a fighting formation.

Montcalm's central brigade is held and a withering fire from superior numbers creates a killing zone for the Russians  ahem! Frenchmen!

Game Turn Seven
The French on the Southern flank start to make progress and there is a real danger that they will come around behind the British Centre.

British skirmishers exchange heavy fire with the Indians.  The British who were on the road have managed to pull out and reform and are currently marching through the woods on the Southern Flank.  The French have a new threat to deal with as they are currently engaged to the front.

A dramatic shift in fortune.  The French brigade is being volleyed to its front while the previous march column has sorted itself out and is now lapping around on the Northern flank (right top edge of pic), the French desperately extending the flanks to hold them.  The artillery is now proving it's worth delivering shot straight down the bridge!

Game Turn Eight
The French realise that things are going against them and carry out some desperate actions.  The Indians charge the 80th Foot and a melee of hatchets and bayonets between the skirmishers ends in a draw for this turn.  The British volley fire breaks the Francophile Russians in the centre!  The British continue to reach out around the Northern Flank, giving the French a real problem.


Another view of the glorious action unfolding.  The French are brigade is being surrounded.  The red counter on this Battalion symbolises that it has yet to carry out it's devastating 'First Fire'

Game Turn Nine
The French carry out assorted volleys. The British successfully turn about a battalion on the Southern flank to fight back to back 'Glosters-style' to hold off the encroaching French.  Fire shakes the 78th Highlanders.

The British hold off the French by fighting back to back
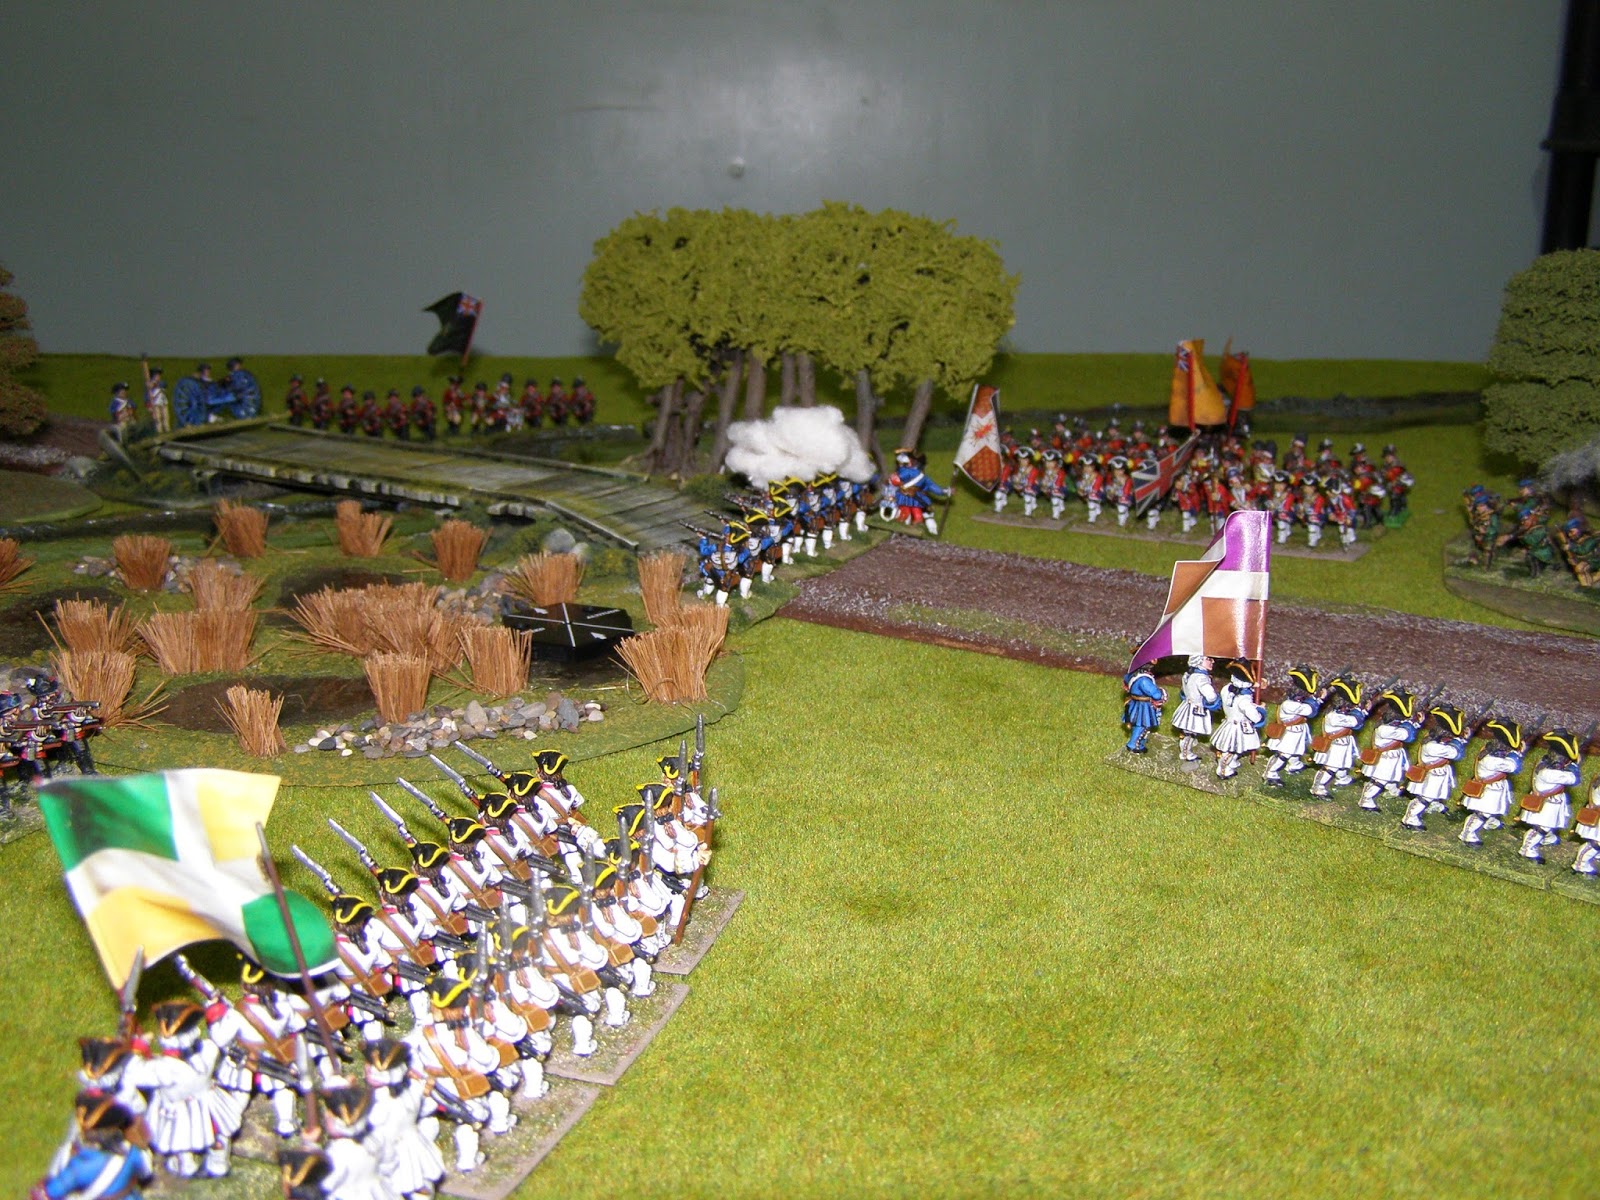
The critical point...The British pour enfilade fire in and advance with 3 battalions
 in to the struggling French Brigade


The British deliver enfilade fire on the French Companies de la Marine who become shaken.  The Indians break under terrific volley fire.  A French brigade breaks and runs....

...and that's it, all over.  This was mainly due to the time being close on 2am!  I think my adding abilities were fading by this point, but neither Ian or myself wanted to wind up a superb game.  I would go as far as saying it was the best wargame I have ever played. This isn't because of the result (my win!) but because of the way the battle developed, causing interesting challenges to both sides but in a not wholly unrealistic way.  It was also satisfying to see the way the game formed because of our responses.  The clear table at the start of the game allowed a picture to develop as we responded to threats. It was really a case of thrust and parry!  

The battle lines remained constant even though we both had to refuse our flanks at opposite ends of the board. The battle was really up when one French brigade ran and another was in trouble when the enfilade fire of the British created a gap which allowed them to march three battalions into.

It was another success for the 'tweaked' Black Powder rules.  Truly a most enjoyable game.


(Ps.  While i'm actually writing a blog update for the first time in ages, can I just say it was good to meet Simon from the 'Big Red Bat Cave' blog at Colours at Newbury today.  Simon had a terrific looking Roman Civil War battle set up which was amazing. So if you are reading this Simon, a big thumbs up for what must have been one of the best games at the show)  :-)


Saturday, 17 August 2013

French and Indian Wars Battle - Black Powder Rules

Sorry it's  been a while since the last post -  a whole heap of stuff has had to be done since the last write up - still all is good now.  I have managed to get a few wargames in, it's just the writing up on here that has had to be sacrificed from the little free time available.


On 8th June, Ian and myself decided to try out using Black Powder for our French and Indian Wars games. We last played Seven Years War/French and Indian Wars using 'Age of Reason', a perfectly good set of rules which gave an enjoyable game.  As it has been some years (probably close to 10 years) since we last opened 'Age of Reason' we decided to use rules we have become more familiar with.  It was another outing for the excellent Black Powder rules.

Because my French and Indian wars units are based as 12 man units (or 16 in some cases) for Age of Reason, we kept these units as 'standard units'.  This didn't affect game play at all in an adverse way and worked well.  You quickly forget that these units are half the size or so one would normally use for Black Powder.


I went British in this game and Ian was in charge of the French and Indians.  You may notice that we did have some assistance from some Continentals from the American Revolutionary War for command figures, artillery and additional militia troops.  These again seemed to blend in well, once the game was underway. We used 50% Black Powder distances and used the Angus Konstam modified play sequence: http://www.edinburghwargames.com/  Initiative, Fire, Command and Move and Melee.

Terrain rules: Swamp was classed as impassable to all except skirmishers. Woods also used the Konstam rules as per his website.  River was impassable to guns except at the ford, but infantry could cross but at 3" move deduction.

All commanders including Montcalm and Wolfe were '8' good, except for the French commander in charge of the 'light brigade' of Woodland Indians and Coureur de Bois who was rated 7 to reflect the difficulty of giving orders to independent minded fellows.  Woodland Indians were classed as 'Bloodthirsty/Skirmishers/Marauders'.  Most British units had 'First Fire'. Louisberg Grenadiers were also 'Crack and Steady'.


I have to say it was a complete joy to see these troops back on the table after being boxed in the attic for the best part of a decade.  I know some people have a rule of selling off what they don't play with in a year or so, but for me I know that I tend to go in circles and I am always so pleased to re-discover the joy of great looking figures which have not been aired for so long.  However, shame on me for keeping these guys hidden away in the dark for as long as this.


Louisberg Grenadiers ahead of the 78th Highlanders

Game Turn one saw both sides advancing towards each other.  The French having the better of the turn. The French Artillery successfully hitting and disordering the Louisberg Grenadiers.  This could have been due to Ian having brought his secret weapon with him....his lucky dice!

Weapons of Mass Destruction -Ian's lucky dice!

Bloodthirsty Woodland Indians

Game Turn 2 brought a lot more action. The British continued their general advance and the French countered with fire and a bayonet charge.  Rogers Rangers recoiled in retreat and disorder.

Game Turn 3 brought even worse news for the British.  In a large melee, the elite British Brigade, commanded by Wolfe in person, containing the Louisberg Grenadiers, the 78th Highlanders, the 47th of Foot and the 80th Light, was broken.  The whole brigade fled, taking Wolfe with them.  The British were now in a dire situation as the right wing collapsed.

A French brigade with impassable swamp to the front and well supported

The Louisberg Grenadiers and Wolfe under serious pressure

Four French units pile their weight on one British Line Regiment

Game Turn Four saw the British break a unit of Coureur de Bois with solid musketry but a charge on the Royale Rousillon by the 43rd Line was held by the French.  The French replied by consolidating their positions and mutual reinforcing. Things were going to get desperate!

The Woodland Indians moved swiftly onto the wooded hilltop early on and were quite content to skirmish their defence successfully

The extreme British left. This became a hotbed of musketry which the French eventually got the worst of - but they held while they won on the Right

A last ditch shoring action by the British in the Centre

Game Turn Five saw the tide fully turn against the British. The British tried to charge against overwhelming odds in the centre but lost the melee by one point.  The French continued to move their now greater numbers to consolidate their strength.

At this point it was declared all over. We had run out of time and also it became apparent that the British (i.e. me!) was not going to be able to reverse the situation.  The British were doing well on their left against the light French troops but had taken too long to make gains against them.  The British right had folded with their elite brigade and army commander fleeing.  This left the French to put superior numbers of troops to squeeze the British centre.

All in all we decided that Black Powder had again given us a superb game.  There was no 'fireworks display' of units as we kept trying to keep linear cohesion to prevent gaps from appearing.  This gave a good feel for the period.  The inclusion of different troop types such as Woodland Indians and Rogers Rangers really added to it and it was really enjoyable to play and just simply to stop occasionally and admire the troops on the board.  

At times like these you realise what a great hobby we have. :-)

Saturday, 22 June 2013

Franco-Prussian War - Black Powder Rules

Following the Franco-Prussian game using 'They Died For Glory' rules, I decided to play another battle but this time using 'Black Powder'.  My board is only 8 feet x 4 feet so some rule amendments were used.  The rules were re-scaled to 50 Percent of the Black Powder distances for all movement and firing.

French Artillery giving the distant Prussian Column a taste of it

Creating roster sheet stats for the Franco-Prussian War units was quite an enjoyable task. Given what is known about the differences in range between the Chassepot vs Dreyse rifles and also the superiority of the Krupps breech-loading artillery vs the French muzzle-loading guns and their restrictive shell fuse settings.  This was really interesting and involved a good deal of research and plain old 'what felt right' gut feelings.

It's the differences built into the stats which help to make Black Powder sets such a great system.  The way that some units can be elite, sharpshooter, reliable, steady etc etc to show their strengths.  Equally the little adjustments in morale or stamina ratings can demonstrate the hard-as-nails Turcos strengths in hand combat vs Prussian Infantry.  This was actually the first game of Black Powder I had played.  I took the unusual route of learning on 'Hail Caeser' first, then 'Pike and Shotte' before finally getting round to Black Powder.  My apprenticeships with the other rules really helped in making playing Black Powder very easy.

I have a confession here...when Black Powder came out I was really wasn't in favour of using it.  I thought that a rule system which covered such a wide area of history was ridiculous as a concept and couldn't possibly give a game that felt accurate in any period, being so general.   On my first reading of the rules I realised that I was wrong.  My regular opponent Ian lent me his copy to gen up before future prospective games and it was a while before I was motivated enough to properly read them.  I understood then about the concept of it being a tool-kit and that it's the little tweaks made to the rules to make them suit the period that make the difference.  I can now understand why those who play the rules rate them so highly.

A view from behind the French lines

Anyway, the game itself was between 4 brigades for each side. One of cavalry and three of Infantry each.  The Prussians were to have their final brigade to arrive on an escalating chance on a D6 each game turn.  All Prussian units were to start off board to cause the French Commander (Ian) the same disadvantages as the French frequently had due to poor cavalry scouting.  The Prussians could therefore pile in where they saw fit.

The French command rating was 7 instead of the usual average of 8.  This would make order giving so more difficult.  Command effectiveness was realistically curbed by using such a simple rule.The Chassepot range was made 20" and the Dreyse 15".  Not such a big difference as may be expected.  Historically French fire discipline was noted as poor and Prussian marksmanship was quite good.  Target shooters have noted that the Dreyse is comparable in accuracy to the Chassepot at it's effective ranges.  I gave the French more reach to reflect the greater range but if the Prussians could get close enough then things would even out.

French right wing deployment. Turcos escape the Krupps fire by remaining behind the hill

The game itself used my Foundry collection.  Please excuse the plain bits of MDF that you see.  These are the brigade commander representations.  Foundry did a great range of FPW figures, but they stopped short at making more than one mounted officer (now discontinued from the range!).  There is a command pack which I am going to have to purchase and then do various mix and matches/conversions etc.  I can see the Perry's ACW cavalry being chopped up and 'Green Stuff'd' to make more commanders.  The Prussian Army is also lacking a decent commander range.  It would be great if Foundry were to fill in the gaps in what is a superb range.

We used the changed play sequence favoured by Angus Konstam and available on his website http://www.edinburghwargames.com/  The new sequence is, initiative moves, shooting, movement, melee.  This overcomes the biggest flaw in BP rules which was to allow the possibility of a unit to rush 3 moves and then fire into the faces at point blank of it's waiting foe.  This change means that troops can also now fire a darned good volley and bayonet charge out of the smoke in the way favoured by a certain British Duke!

A two unit brigade of Prussian Cavalry galloping forth!

The French threw and moved first.  Ian moved some units forward on his right flank and awaited developments to see where the weight of the Prussians deployed. Orders to the French infantry failed to be communicated due to the difficult command rating.  I made a two pronged attack, Prussian cavalry advanced in the centre, with an infantry brigade behind and also a Bavarian led Brigade advancing on my extreme left towards the French on the lower hill.


Prussians and Bavarians prepare to assault the low hill. The Turcos come forward to meet them and the Mitralleuse begins it's deadly music....until it jams!

The second game turn saw my Bavarians and Prussians start to threaten the French on the hill. My cavalry moved into a charging position in the centre.  Ian responds with fire.

Game turn three saw the  French put more fire down on my Prussians.  My attack on the left gets quite a chewing from the Mitralleuse until it jams.  The Prussian cavalry charge and are counter-charged in turn by the French. A good cavalry scrap results.  I order my central infantry to move forward with all haste, now that the French cavalry are distracted they can advance quickly in columns and close....alas! A double-six on the order dice...an orders blunder!  I can only hope that I get something harmless...again I throw the worst possible and the result is a retreat!  Unfortunately this takes the entire brigade off the table and so things are suddenly looking bad for the Prussians!

The French Cavalry,with flanking fire support, await the Prussian Cavalry

The cavalry battle also goes against the Prussians. I took fire as the cavalry charged and the bigger French brigade defeats my own own.  This turn has gone badly.  Luckily my cavalry remain in the melee but my Kurrassiers are shaken.

Game turn 4 sees my reinforcing brigade arrive...hurrah! But....my cavalry break and flee!  It's all over, two brigades out of 4 being broken means my army is broken.  Von Moltke and Von Bismarck will not be handing out tea and medals.

 The French cavalry follow up on their defeat of their Prussian enemy

In conclusion, how did it go?  Well, as commander of the Prussian army, the result was not a success. The game however was fun and gave a good feel and it was only bad luck and really crap (I mean really really crap) dice throwing that let things down badly for me.  Ian felt it went well and that the rules gave a more enjoyable game for the French.  His orders to his troops were harder to get them to respond to, but Black Powder did allow some freedom for them to move.  

From an army creation/stats designing point of view the rules were terrific with most of the tweaks appearing to be in the right direction. The rifle distances seemed to play well and the strengths and weaknesses of units and commanders seemed just right. The Prussian artillery advantage never really made its case....an obvious reason being that I had at that time only one Krupp gun!  So the French never really suffered in a realistic way. (I now have another Krupp gun ready to deploy!).  The biggest change of all to the rules will be on units leaving the board due to blunders.  With a 4 foot wide board this essentially ends the game if a blunder is rolled.  The change to the rules is now that the unit is off-board for D6 turns and not permanently.  If a 5 or 6 is thrown then it could still be a game changer of course - a lot seems to happen in few turns in Black Powder, but it's no longer guaranteed fatal.

I think Black Powder is going to be the rule set of choice for my Franco-Prussian games from now on.  I was so inspired that I have started a big re-vamp of my armies.  Re-basing on MDF instead of bendy thin plasticard and card.

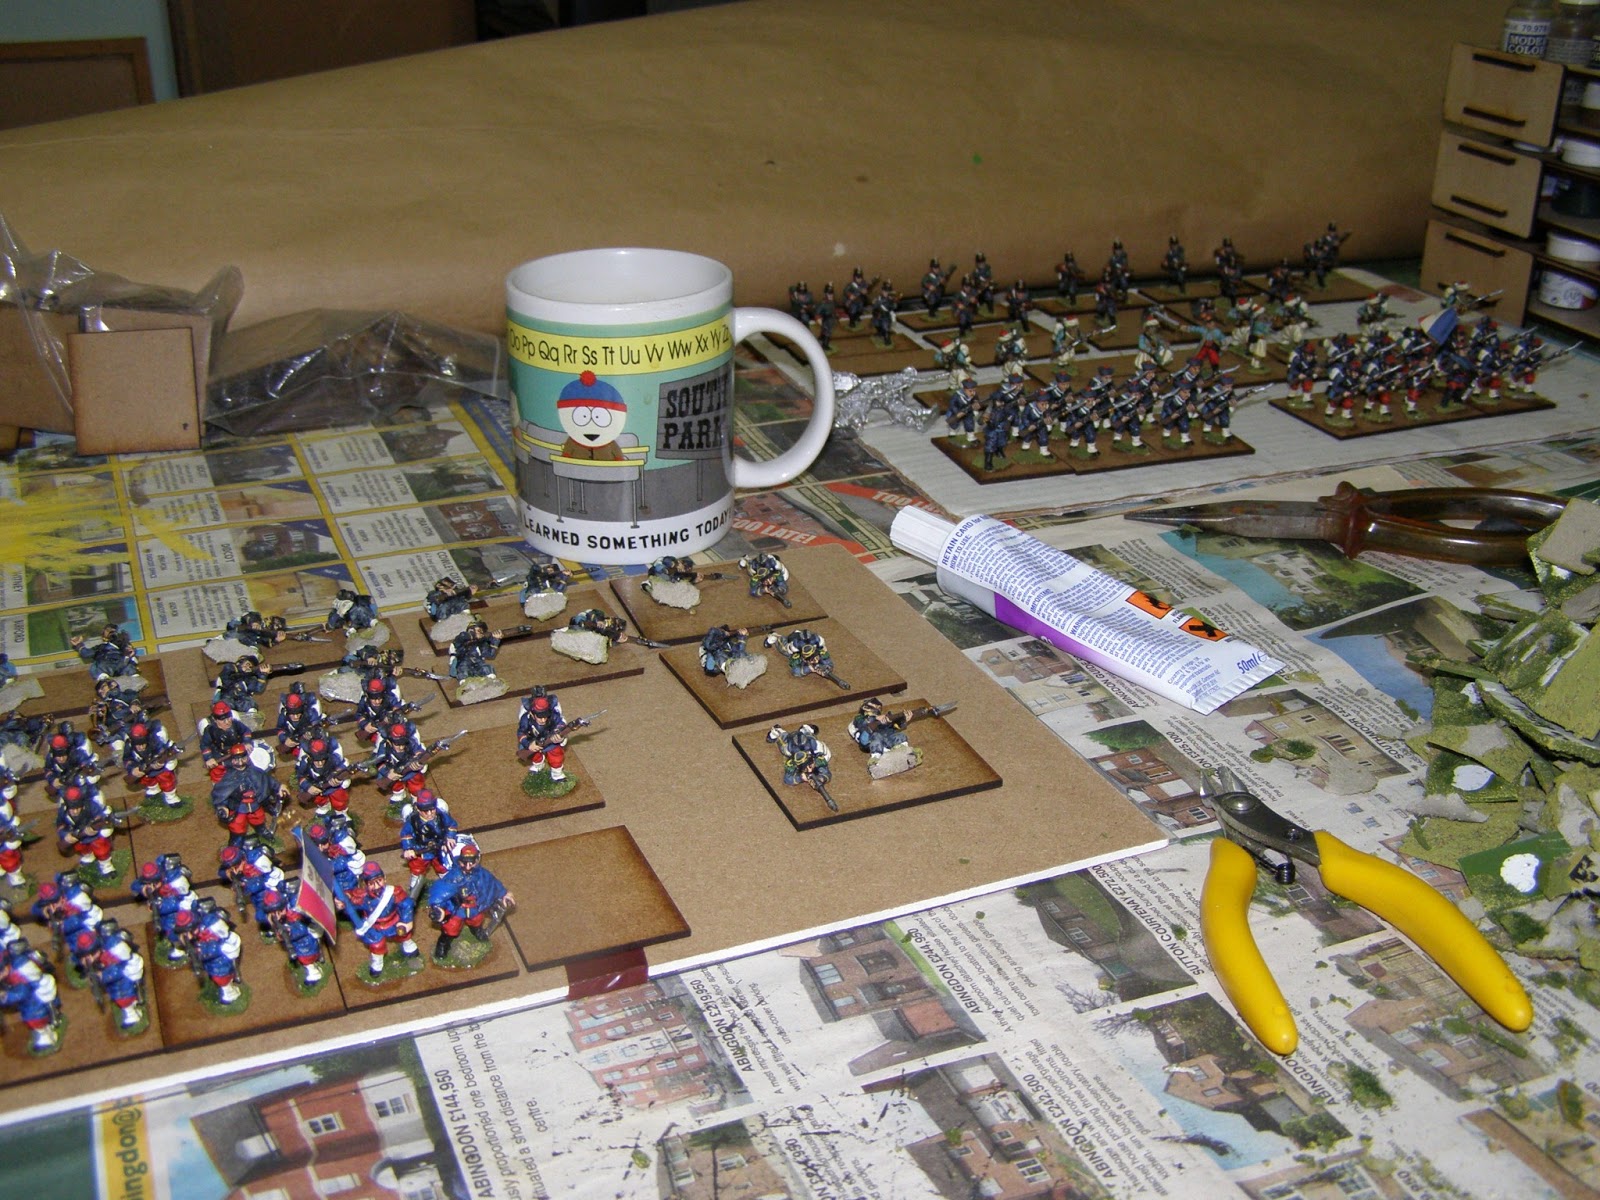
The mountain old bases shows serious re-basing is in progress!

Re-painting is underway, replacing the yellowing old enamel paint with fresher acrylic colours too.  I have also changed the scale from 1:50 to 1:40.  This means my French units instead of being 12 men strong will be 16. A small difference but it looks so much better on the table.  GMB are also doing Franco-Prussian flags now and the ones I received in the post today are fabulous. 

My board doubles as an 8 foot long painting area!


Work in Progress!

 Inspiration has struck again and another massive re-vamp begins.  


Friday, 31 May 2013

Franco-Prussian War - TDFG Rules

Please excuse the long absence. Much has gone on of late and a new weekend job has bitten into my blogging time somewhat.  The upside of this is that I will have more pennies to spend on metal shiny bits so it's not all bad!

I have managed to get a game in...well actually two. Both Franco-Prussian War.  The first game was with an old favourite set 'They Died for Glory or 'TDFG'.  I loved this set from when they first game out.  A period specific set which played very easily and always gave a quick game.  These were a breath of fresh air in the early 90's and were another example of beautiful glossy well illustrated American rules which looked fun and interesting (like 'Fire and Fury')...as opposed to UK produced rules which were often poorly printed from someone's typewritten sheets (or so they appeared!)  with few illustrations.

Gorgeous Foundry Prussian Hussar Models (enjoyable to paint too!)

I had only played these rules about once in the last 10 years though, and that was with a novice and therefore  gave a cautious but fun game, easy from my point of view because of the simple game mechanics.  I arranged a wargames evening with my regular opponent Ian recently and I decided it would be fun to get the old favourite 'TDFG' rules out again.

The rules 'TDFG' (less of a mouthful!)

Ian played Prussian and went straight onto the attack against my 'position magnifique'.  It was great to see the figures bounding into action. Assault columns charging headlong as they so frequently did in those summer days of 1870.  For anyone not familiar with TDFG, a unit can do two actions, move twice, shoot twice, move and shoot (or shoot and move in French case). Hence in the pics you will see my custom made '1' and '2' markers to show which units are at what stage.  There is a set sequence of 17 stages per turn for both sides to go through for the turn to be complete.  


The Prussians on the attack

Firing is resolved by throwing 1 x D6 per 3 figures.  Should French infantry shoot at 0 -12" (or 0 -24" if playing double distances in 28mm) at a cavalry column then anything from a 1 -6 is a kill.....yes that's right...no dice needed!  Shooting at a cavalry line or Infantry Column at 0 -24" requires 2 - 6 (so anything but a 1).  As you can tell...things are going to get messy very quickly.  

Melee between opposing heavy cavalry means throwing 1 x d6 per figure in the combat. 4 - 6 on a d6 is required for a kill.  +1 of they charged in.  This means that it is likely that if you have win a heavy cavalry combat you will be lucky to come away with many men left.

Morale is a simple case of falling back on 50 per cent casualties.


Infantry Columns closing in fast

If you play the basic rules then no orders are required to make any moves, you can just do whatever you wish and your troops will obey.  There is a written order option for in the optional rule section which until this game I never even thought of it being necessary.


Hussars charging into a wild attack

So we have established that movement is easy to do, firing is deadly, melee is deadly..artillery is....really deadly...long ago I removed the shell option and kept the shot only as that was sufficiently nuclear tipped!


 French Infantry about to wipe something out with one volley

Glorious French Cuirassiers about to charge home and lose most of their men

Ian charged in a very General Steinmetz manner - straight in hard, using the Prussian aggressive tactics of the time.  The rules really make the French act on the defensive all the time.  Why move when you can shoot twice?  Also the rules make the French shoot first then move.  If they close enough to shoot then there is little point moving. Might as well stick another volley down and remove the threat. If the French dare move they are going to get charged or shot down.

More detail of the Prussian Hussars 

The French lost a gun to Krupp fire. With Quick moving Prussian Hussars coming from the rear, I merely about turned a battalion swung it like a hinge and in the next turn gave a lethal double volley. Not a morale check in sight, just a care-free gallic shrug and opened fire.

Prussian Grenadiers having cleared a hill

The game was effectively over in the first turn in blaze of Chassepot fire cutting down Prussians by the score.  The second turn was mopping up the remaining Prussians.

So why was this game so different to the many I played before?  It wasn't unrealistic..for sure the shell firing guns were deadly and the aggressive Prussian columns were shot down in minutes when they assaulted strong French positions. This is historical fact and the rules worked in this respect.  Ian reminded me that the rules were designed for 15mm figures and therefore you could get several divisions playing on each side rather than the three brigades each which I had.  This would absorb losses more easily.  You just need to keep more battalions behind the first, as brigade morale is not affected by unit losses.  Cavalry are one-shot weapons in these rules. You unleash them and then they are gone.  Again quite realistic when charging against breechloading rifle armed infantry.

I have always really liked the rules but some things just jarred a bit this time. I think the experience I have gained in the last 10 years of using different rules (since playing an experienced opponent with TDFG), has given me more of an insight into what works for me.  In some ways a game playing exactly how it might in history might not be as satisfactory as one hopes.  The rules did punish aggressive charges after all, so TDFG does give many realistic outcomes.  I agree that with lots of 15mm figures and reduced ranges a better game would result.  

I also think I like rules to have an aspect of orders and failures in those orders being always possible (this would reflect the French Command in the Franco Prussian War quite nicely) and prevent units doing what you want them to do all the time (sometimes the opposite!).  I would also like the French to display some initiative and make some local counter-attacks - as they were capable of doing without it being a certainty that they are going to get wiped out everytime for entering melee with Prussians.  If a certain initiative throw could be made then shouts of 'En Avant!' could ring out and Turcos could give the Prussians a hard time. The fire doesn't have to be quite so deadly, as I would like a game to go a few turns at least (but not several days!).

So in a nutshell, can command and control be incorporated better? Can an army be encouraged to maintain Brigade cohesion rather than allow units to move in a firework display pattern if they so wish? Can initiative be used by a defender? Can firing and melee be tweaked to make it more fun and not quite so devastating?  Can morale rules be a little more sophisticated by having scales of failed tests?). It looked like a major re-write to me.  The decision was made to use a different set of rules for the next game.....hopefully you won't have to wait a month for me to write this battle up!