Friday 27 July 2018

Normandy - Loyd Carriers with 6 Pounders

As so often seen on this blog, I go in cycles with my interest in wargaming history.  I am glad at least that I always return back to favourite periods and nothing 'drops off' permanently.  I do find that it is also seasonal.  


For some reason, in the summer I tend to paint and read up either about the English Civil War or the Normandy campaign.  Perhaps it is because for over a decade, I spent weekends re-enacting the Civil War and it was almost always in the summer.  In the summer the high overgrown hedges in the country lanes do often bear similarities to the newsreel footage of the bocage in 1944.

So my attentions have been in Normandy again as we can see here.  This particular Loyd Carrier is something I started in the evenings whilst being away from home on a course for 2 weeks in 2016.  My friend Dave, also on the course, followed my grim (and possible insane) determination to build kits and paint after a hard day staring at computer screens rather than go out and do something more interesting.  For some reason I never finished this Loyd Carrier until I picked it back up a couple of weeks ago.  It is from the Loyd Carrier and 6 Pounder set by Plastic Soldier Company.  It is in 15mm Scale (1:100) so the model of the carrier is only a few centimetres long.  It always amazes me how much detail that can be seen and painted in something so small.


I have long been interested by the battle for Hill 112 in Normandy.  This was prompted by a book I bought as a teenager.  The book was 'Hill 112' by Major JJ Howe MC. It is a book I take down from my book case very often.  I discovered in 2004 at my Great Grandmother's funeral that one of her brothers was there in the battle for Hill 112 with 5th Battalion Duke of Cornwall's Light Infantry.  I was told this by my Great Great Uncle (another brother of my Great Grandmother), who himself had been in the DCLI and then the Kings Regiments (and had been at Dunkirk and the whole of the siege of Malta).  So for this reason also, I wanted the unit to be part of 5 DCLI, 43 Wessex Division.


Once the unit decision was made, it was a case of researching badges and finding photos on-line.  I learned a lot about the unit markings.  Unfortunately I couldn't find a company who made 15mm decals for the Wessex Division or the appropriate numbering so I hand painted these on the carriers. This didn't turn out too badly.  I noticed from photos that the numbering was sometimes applied quite crudely without stencilling.

The Universal Carrier above has the '68' of 1st Worcesters painted on quite crudely.


With a bit of Normandy dust and weathering the badges were toned down a bit and seem quite passable.


I always used to think that the British uniforms and vehicles were very dull, but, just like British uniforms in 1918, there is a multitude of badges and coloured flashes on the uniforms and it was fun representing these on the sleeves with a single haired brush!


With the anti-tank 6 pounder's I found myself going to the length of finding out how the armour piercing shells were marked up and painted these too.  The Plastic Soldier Company kits always assemble really well and very crisply.  The kits pleasingly come with lots of ammunition boxes and loose shells ready for use and these add to the scene nicely, giving a sense of urgency.  I'm sure the ammunition boxes are not secured to Larkhill standards, however, one can feel that a counter-attack of Panthers is expected and all are ready to receive them!


I like to make the units unique and fit into my formations.  Once I finished this one model (after it's patient 2 year wait!)  I decided I would make and paint the remaining 3 models in the box!   I was quite enthusiastic after completing my first one.  The Loyd carrier had always struck me as appearing rather old fashioned and somewhat dull, but once built and painted with crew in place it looked more like a very practical and powerful tracked beast with an appearance that made me wish I could drive one.  How much fun would that be!


Building and painting the remainder took about a week of evenings.  These 3 carriers and guns will suffice as the Anti-Tank Platoon for the Battalion.  I use 'Panzergrenadier Deluxe' rules and units are scaled down.  So in reality there would have been 6 guns.   I must admit that Panzergrenadier Deluxe are my rules of choice for WW2.  I have tried many and for me these rules give the period the best feel.  The importance of reconnaissance, cohesive orders, and the tension of advancing onto an apparently empty battlefield whilst trying to pre-empt what is bound to follow when the first shot whistles across the battlefield really does make it a great and quite tense game.


There were 4 vehicles in the box and so this one was the remainder.  Rather than leave it in the box as an odd one out, I painted it also. This one is now part of 4th Battalion, Wiltshire Regiment of 43 Wessex Division.


The Loyd Carrier above is painted with the '64' of the Machine Gun battalion of the 43rd Wessex Division.


The Universal Carrier above marked with '56' is one of 4 Wiltshire's vehicles


So what's next...well I have painted a few more vehicles recently (or completed should I say as these too have been sat undercoated for two years!).  I will post these up shortly.  But my painting desk is currently empty with a choice of troops from 2000 years of history to choose from.  More dark greens and khaki or perhaps some scarlet coats?  We will see!

Tuesday 3 July 2018

The Battle of Thapsus 46BC - To The Strongest Rules

10mm Numidian elephants escorted by Numidian light infantry javelinmen


Still obsessed with my current reading and painting period of the Roman Civil Wars, this month's game was the Battle of Thapsus.  If I was more organised I would have done these battles in chronological order but I have only just painted the elephants and I still don't have enough troops for Pharsalus yet!


To summarise the history of this battle just very briefly: After defeating Pompey at Pharsalus and defeating the Senatorial Optimates further in the Eastern Provinces, Caesar pursued into North Africa.  Stalemate battles ensued.  Caesar settled down to await reinforcements from Sicily and besieged Thapsus.  The Optimates were forced to accept battle and ventured out to attack Caesar from behind.  Caesar left the siegeworks and formed his army for battle:

According to Wiki (yes I know it's not the best but it was one of the most convenient sources in this case):

Optimates:

Commanders:  Scipio, Petreius, King Juba I
Legions: 12+ (72,000 men)
Cavalry: 14,500
Allies: King Juba's (numbers not known) including 60 elephants

Populares:

Commanders:  Caesar and one other
Legions:8+ (50,000)
Cavalry: 5000


 Optimates on the left and Populares on the right


Historical Outcome:  Caesar's men impatient and keen for another victory surged forward.  The elephants (presumably on the right) were defeated and trampled their own men, whilst the left wing elephants made their attack on the Populares centre.  This attack was held and then pushed back.  Caesar's own cavalry then outflanked the Optimates and took their camp. Juba's men deserted and the victory was complete.  A massacre then followed and prisoners were not spared (due to Caesar having had an epileptic fit apparently and thus unable to intervene).


Wargaming the battle:  Well on first glance it looks like Caesar is really up against it!  He is seriously outnumbered and his generalship is going to be stretched with 2 known generals (the name of his other commander does not seem to be recorded) compared with 3 generals on the optimates side.

In my playtest to remind myself of the rules, just prior to the game - I played one wing vs one wing.  In this the elephants on their first ever outing smashed straight through all who stood before them...so it seemed far worse for Caesar than I could balance up.  So what could I do?

I decided not to do too much other than improve morale and command quality for Caesar.  This seemed to be historically the right thing to do.  His men had known victory after victory.  Two legions had just deserted from the Optimates. Surely total victory was in the grasp of the Populares.  Caesar had proved himself to be both lucky and brilliant and so I made the following adaptations for the battle:

Caesar:  Classed as 'Brilliant' - all other generals as normal

Optimate Legions: downgraded by one morale save to 7+ instead of 6+ (but all allies remain as their standard settings).

One Populares Legion: Upgrade to Veteran 5+ morale but this is stuck on a label beneath the base and not revealed until combat is joined for this unit (to prevent it being unrealistically avoided on purpose).

No other changes to basic rules (other than using TTS 'Even Stronger' Version 5 amendments).

 Numidian's on the Optimates right flank - King Juba I commanding


Terrain was classed as flat with one area of marshland and beyond both flanks were major impassable water features

Caesar's camp was placed on the table though historically was much further back.

 View from behind the Optimates' centre


Ian took command of the Optimates (I thought it would be more fun for him to use the elephants and greater numbers of troops).  He got the highest chit (we use the chits instead of cards so as not to obscure the table), and ordered his army to do a general advance.  They obeyed (except for his left flank which was sluggish in obeying orders).


It did feel a bit odd in the pre-game brief to describe your own general as being brilliant i.e. 'I am Caesar therefore I am brilliant!'.  Sounds a bit egotistic but we know what we mean when we take these parts when playing at commanders!


I (as Caesar) could not allow my men to hold back so I ordered them into a general attack too.


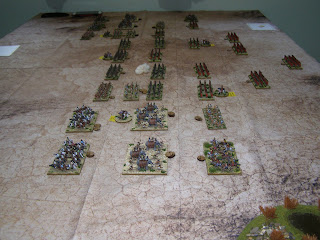
These photos show these opening stages well.


..and then the lines collided!  Disorder struck some units very early on (much earlier than the last game we had - which seemed to have a lot of freak high saves constantly).  This time Ian (as Scipio) suffered some of the worst luck with saving throws (or chit pulling) that either of us have ever seen.


You can see the puffs of cotton wool (not smoke markers but obviously dust clouds!) representing disordered units.  Scipio has a whole flank of elephant units and his centre and his left becoming disordered and with just one on the Populare's side (I can't recall it but they must have been hit by archery), or it was misplaced cotton wool.


My reserve units are preparing to meet the elephants and Numidian Light Cavalry should they break through.


Disorder started to affect most units in the Optmates forces and then units started to break.  I forgot to apply the Even Stronger Version 5 rout tests in the first instance, but from then on I remembered.

Unfortunately I got this bit slightly wrong which probably wound the game up a little bit quicker than it otherwise would have done (sorry Ian).  There are two attempts to pass a rout test. If a unit fails then they become disordered - they do not immediately rout! (yes I read 'rout test' and clearly didn't take in the paragraph in full) - UNLESS they are already disordered when they do indeed rout.  So as one unit broke and their neighbouring unit took a rout test - they should have just been disordered when they failed and not routed. Of course as another unit ran I applied the test to the next unit and so on.  We saw a proper 'England cricket style' batting collapse - as unit after unit broke.

Don't get me wrong - I think the TTS 'Even Stronger' V5 changes are much better and I really like them - far better than the old demoralised command rules and I think it is quite right that neighbouring units are affected by what happens nearby (the lack of such effects to friendly units was what I found to be the worst thing in the ACW 'Fire and Fury' rules).  It is just my own misreading which caused the Optimates army collapse to appear much worse than it actually was.  In all respects the game was absolutely brilliant and very enjoyable indeed.  TTS is an outstanding set of rules and I very highly recommend them.


Now for the actual real-life battle this collapse was probably pretty realistic, and it would have been difficult in the game for the Optimates to have held on much longer as my troops were disordering units all over the place (causing some quite legitimate routs when they were 'Rout Tested') - however the medal tally would have been different had I not misinterpreted the rules.  I would have lost some units to the elephants on my right I am sure, as the game went on for probably a couple more turns.  So the medal tally of 13-0 should not be taken as being the proper result.  Scipio would have lost for sure but Caesar should perhaps have worn his reading glasses and read the important paragraph properly.  I will next time!


PS - If you don't have much time to complete a game then I recommend misreading the rout test rule as I did - a broken army will collapse very quickly!