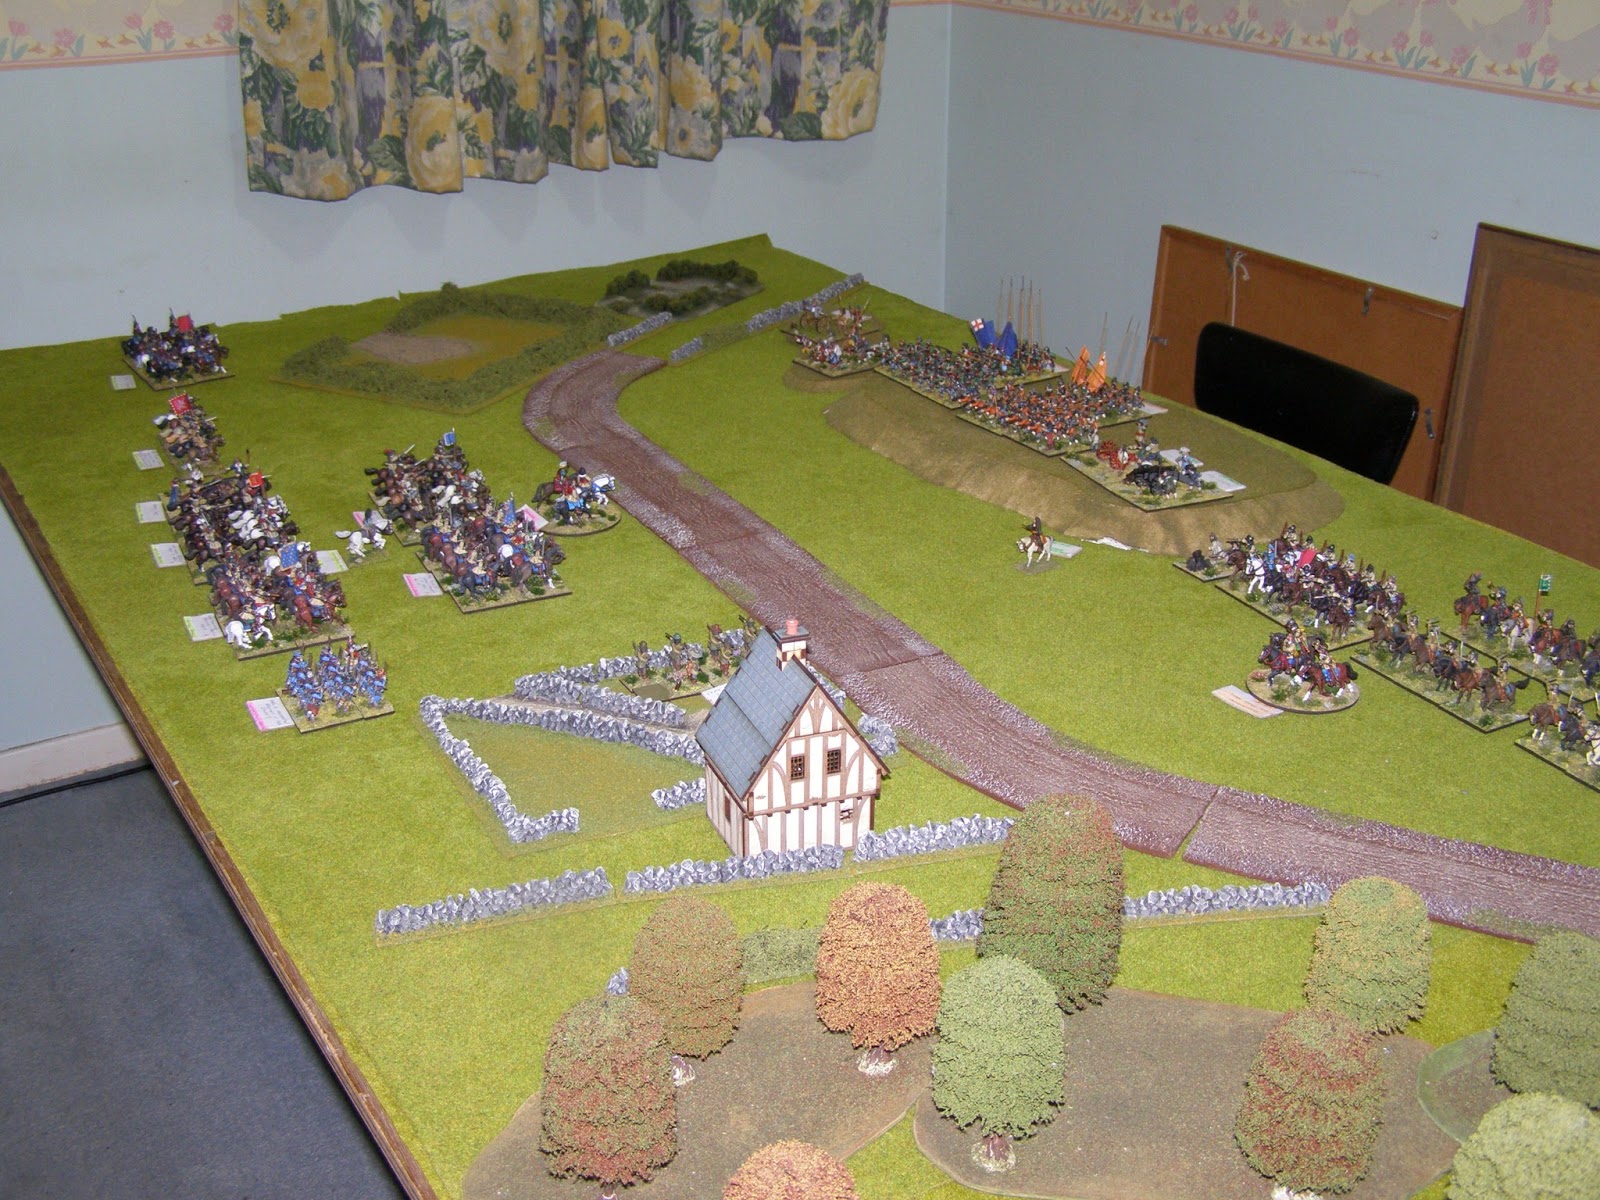
Hopton Heath ready for the March 2013 refight with 'Pike and Shotte'
I bought the scenario book for Hopton Heath about 22 years ago or so and played it once with the ruleset it was intended for: 'Forlorn Hope'. I had quite a large collection of poorly painted Minifigs then (since retired) and the smaller figure scale of 1:33 meant that I could play it, which I did so on my barrack room floor. That play-test so many years ago was slow and indecisive. The tiny forces made casualties very hard to inflict and the difficult terrain meant it took ages to move anything. All in all disappointing (as was all but one game using Forlorn Hope, and that one was was only because I won a resounding victory though it took two whole days to play!).
This time I used the same scenario book but scaled at 1:20 which gives really nice sized units for Pike and Shotte in my opinion. Some preparation was necessary, the most obvious being re-scaling the units then making cards for each unit to show which unit they were representing and the brigade to whom they belonged. Special unit features such as morale was also shown on the card for ease of reference.

Nothing to see here: Mostly woodland in the 'Old Deer Park'
The History Bit
The actual battle was fought in Staffordshire 370 years ago to the week of the game 19th March 1643. ( I have just noticed the anniversary but didn't realise at the time of playing!). In the actual battle the Parliamentarians intended to rendevous to combine forces to attack the Royalists holding Stafford. The Royalists were forewarned of this and diverted a force to attack the Roundheads before they could strike. The Parliamentarian Commander Sir John Gell successfully met up with Colonel William Brereton's advance party and took up a position at Hopton Heath on the hill overlooking the road from Lichfield to Stafford. The Parliamentarians were a mix of Infantry, Cavalry, lots of artillery, dragoons and Clubmen(!). The Royalists were mostly cavalry, with dragoons and one small unit of infantry...and one large cannon called 'Roaring Meg' (not to be confused with the mortar at Goodrich Castle).Deployment
The Parliamentarians formed their infantry on the hill with their guns supporting. The clubmen are also deployed on the hill. The cavalry are off on the left flank to the side of the hill giving protection to the infantry's left. Enclosures protect the infantry on their right flank. The hill is protected by rabbit warrens. The rabbits are clearly anti-Royalist as the whole front of the hill to the road facing the Royalists is covered by the horsey-leg breakers that are the rabbits holes. Gell's deployment was superb. To further protect his force dragoons were placed far forward in the farm enclosures on the Royalist side.
The Royalists under the Earl of Northampton had little choice but to face the Parliamentarians with their cavalry.

View from behind the Royalists lines at the excellent Parliament position
The Royalist Earl of Northampton sent his dragoons to clear the Parliament dragoons to secure his flanks (but didn't succeed on the right). The Earl of Northampton then cleared his right with cavalry. An artillery bombardment then followed in which the many Roundhead guns were notably unsuccessful in their shooting. The Royalist 'Roaring Meg' having much more impact; 'the first round killed six of the men and hurt four and the next made such a lane through them that they had little mind to close again'.
Northampton then charged with his cavalry which routed all of Brereton's Roundhead cavalry. The clubmen fled at the sight of this. Northampton then wheeled up into the flank of Gell's by now worried infantry, who managed drive off the cavalry nonetheless with musket fire. The cavalry turned on the exposed guns and captured some after a see-saw fight.
Gell took command of his greatly disorded force and by force of command managed to adopt his infantry into a defensive posture. The Royalist cavalry attacked the guns again and another brutal see-saw fight developed, though the Parliamentarians succeeded in dragging their guns to safety. Northampton then went for Gell's infantry but the Roundheads stood firm and apparantly unhorsed Northampton who then refused quarter and was killed. Sir Thomas Byron took over command and charged Gell's infantry again and he too was seriously wounded along with several other senior officers.
At this point Brereton's infantry was spotted making their way to the battlefield from their long march. The Royalists failed to rally and withdrew off the battlefield as night fell taking the guns they captured with them. The Parliamentarians decided to withdraw away from Stafford during the night, giving the strategic victory to the Royalists despite having won the battle (depending on which history books you read...a much debated point!).
Notoriously Gell refused to hand Northampton's body over to his son for burial unless his captured guns wagons powder and prisoners were returned. The Royalists refused these demands so Gell had Northampton buried at a church in Derby.

Behind Gell's infantry - A strong hilltop position
The Wargame
I opted to go Parliament, mainly because they were going to be more static and I thought it would give Ian a more interesting game. Ian's objective was to break the Parliamentarian position to leave remove the threat to Stafford. This did mean that Ian would have very difficult task and a hard choice to make right from the outset. My dragoons being postioned so close to his troops forced combat immediately. No flank marches or sneaky manouvres in this battle - it was going to be sabres drawn from the first throw!
Ian sent his infantry to attack the dragoons in the farm enclosures in his position right at the beginning. This was a good move and was successful. Ian then marshalled his first brigade of Horse to attack at an oblique at Brereton's horse facing him. This would mean he avoided the rabbit warrens that would disorder his horse, and possibly leave Gell's infantry open to attack as per history.
My cavalry met his attack at the halt and with pistols drawn in the 'caracole' style of the early war Roundhead cavalry. This was quite successful and emptied Royalist saddles. The first round of combat was inconclusive but bloody.
Each new turn I had to dice for reinforcements. This was Brereton's infantry which arrived in small numbers in before darkness in the real battle. The chances of them arriving increased per dot on a D6 each game turn.
Raw units ('Freshly Raised' in Pike and Shotte') also had to dice when attacked to see how they would react. My dice were truly puritan as my raw units threw 'Sterling Job' The troops do their duty -no effect' and survived being overcome by terror or panic. This was good news for me as it meant I wouldn't have units running off all over the place.
The second game turn saw the cavalry battle continue with the Royalists getting the worst of it. Ian's second cavalry brigade refused orders to advance so his troops in combat were unsupported

Clubmen - nice and safe the way we like it thank you very much!

The view from my extreme right. Not much happening here. The cavalry action is on my far left (in the distance)
I maintained my position with Gell's infantry and guns on the hill and let my cavalry push their advantage and continue the cavalry combat with all of their modifiers for winning and supported. Ian's cavalry broke and tried to flee but were slowed by the terrain around the farmhouse and enclosures. As they broke I followed up with a sweeping advance upon the same enemy. Trapped they were cut down to a man or fled. At this point victory was conceded by the Royalists.

Brereton's well-supported cavalry counter-attack Northampton's Brigade trapping them and cutting them down

The Royalist Second Cavalry Brigade - refusing its orders to advance seals the fate of the Royalist Army
Conclusion
A fascinating scenario which played really well with Pike and Shotte as the rules. What a contrast to the game I played with Forlorn Hope all those years ago. Pike and Shotte gave a game that played in 3 game turns and lasted probably less time than the real battle! I really enjoy the challenge presented by playing a historical scenario and its great to see the real problems facing the commanders replicated on the table. In terms of wargaming, the Royalist player really is up against it as he has a large cavalry force with which to evict a strong Roundhead force in a superb position. Ian probably did exactly the right thing by going for the Roundhead cavalry and avoiding the uphill slog over the rabbit warrens and being destroyed by musket fire and grapeshot! If his second cavalry brigade obeyed orders he could have turned the Parliament flank and hit the Roundheads hard. Once his first brigade was gone there was no way his army was going to force that position.I have four of the books produced by Caliver Books for ECW scenarios and I'm still building up towards decent sized forces for these. Really looking forward to when I can though. Nothing beats trying to replicate history and facing the same challenges commanders faced in 1643, albeit with dice, lead figures and good set of rules! :-)
Nice looking game and great pictures!
ReplyDeletePhil.
Excellent!
ReplyDeleteFantastic looking game - beautiful figures and terrain. Best, Dean
ReplyDeleteGreat report!
ReplyDeleteThat's a lovely looking game, and a cracking write-up to boot. Thanks for posting!
ReplyDelete